Few things are as frustrating in a home as a misbehaving toilet. That annoying “shhhhh” of a running toilet, the dreaded double-flush needed for a weak flush, or the perplexing phantom flush in the middle of the night can disrupt your peace, waste water, and quickly inflate your utility bills. But here’s the good news: many common toilet problems don’t require an expensive plumber. With a little knowledge and some basic tools, you can become a master of toilet troubleshooting and tackle these issues yourself.
At Winstar Hardware, we believe in empowering homeowners with the skills to maintain their homes efficiently. This comprehensive guide will walk you through the most common toilet woes, explain their causes, and provide clear, step-by-step solutions. Get ready to put an end to those frustrating toilet mysteries and restore harmony to your bathroom!
Understanding Your Toilet – The Basics of How It Works
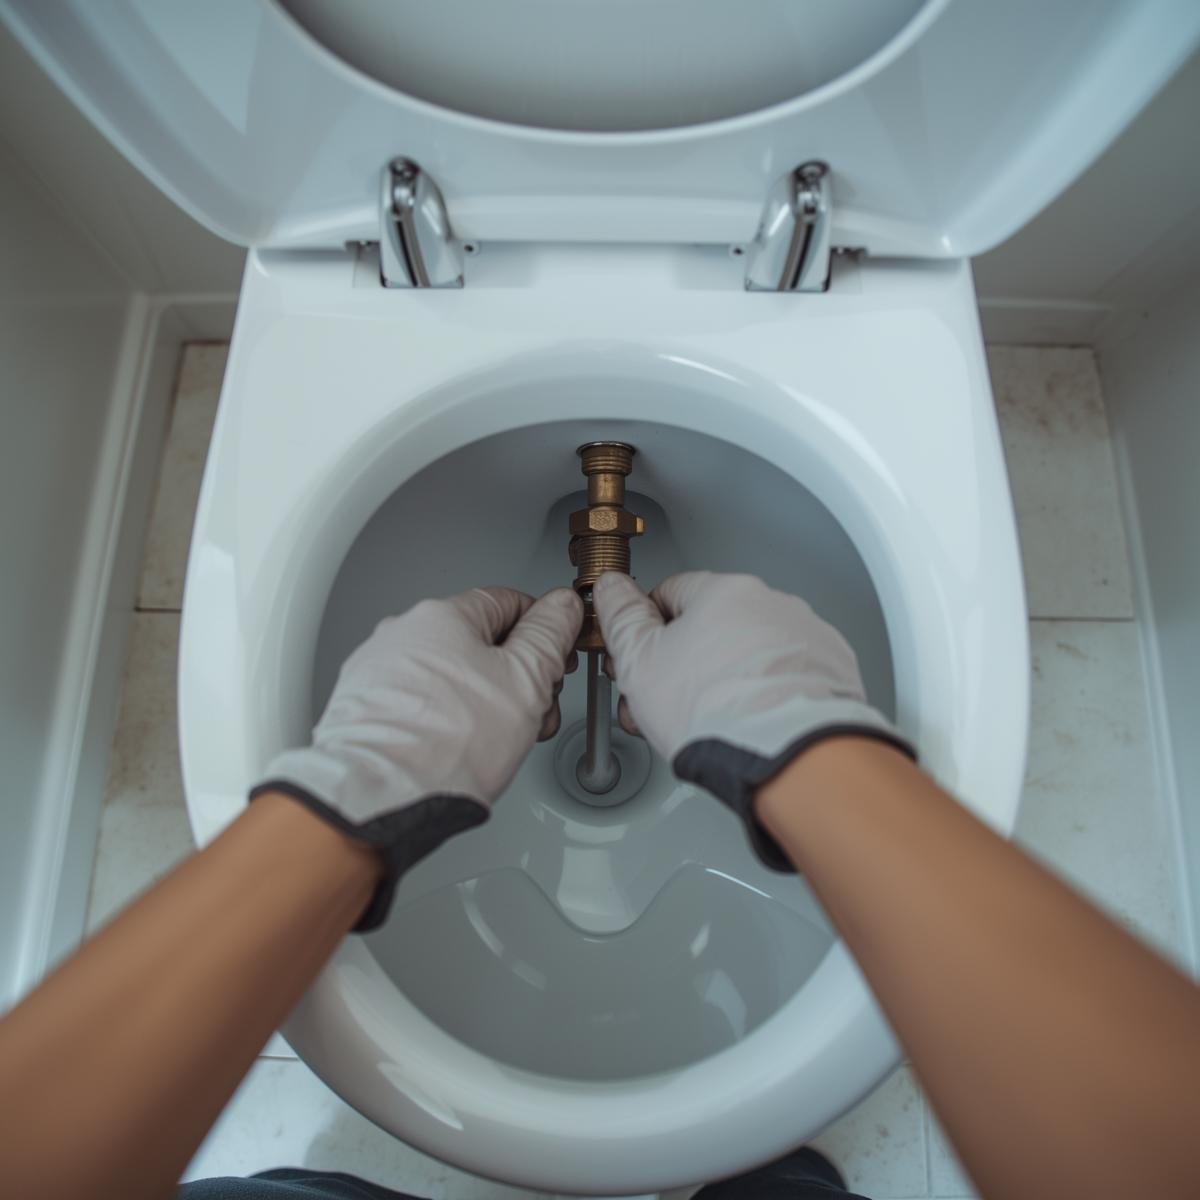
Before we dive into toilet troubleshooting, it helps to understand the fundamental mechanics of how a toilet operates. Despite looking complex, a standard gravity-fed toilet relies on a few key components working in harmony.
The Anatomy of a Toilet
A standard toilet consists of two main parts: the bowl and the tank.
- The Toilet Tank: This is the top part where water is stored. Inside, you’ll find:
- Fill Valve (Ballcock Assembly): This component controls the water entering the tank. When you flush, it refills the tank to a set water level and then shuts off.
- Flapper (or Tank Ball): This rubber or plastic seal covers the flush valve opening at the bottom of the tank. When you flush, it lifts to allow water from the tank to rush into the bowl.
- Flush Valve: The large opening at the bottom of the tank where water exits to the bowl when the flapper lifts.
- Overflow Tube: A vertical pipe that prevents the tank from overflowing by diverting excess water into the toilet bowl. The fill valve also typically has a refill tube that sends a small amount of water down this pipe to refill the bowl after a flush.
- Float Arm/Cup: Connected to the fill valve, this mechanism rises and falls with the water level, signaling the fill valve when to shut off.
- Handle & Chain: The external handle is connected by a chain or rod to the flapper.
- The Toilet Bowl: This is the lower part that holds water and connects to the drainpipe.
- Siphon Jet: A small hole at the bottom of the bowl that assists in creating the siphon action during a flush.
- Rim Jets: Small holes under the rim of the bowl that help wash down the sides of the bowl.
- Trapway: The S-shaped or P-shaped pipe built into the bowl that creates a water seal, preventing sewer gases from entering your home.
Read this article from The Spruce for more detailed explanation on the components of a toilet tank and bowl.
The Flushing Cycle: A Quick Overview
When you press the toilet handle:
- Lift the Flapper: The handle pulls a chain or rod, lifting the flapper from the flush valve opening.
- Water Rushes Down: Water from the tank rapidly empties into the bowl.
- Siphon Action: This sudden rush of water creates a siphon effect in the trapway, pulling waste and water from the bowl down the drain.
- Flapper Reseals: As the tank empties, the flapper falls back into place, sealing the flush valve.
- Tank Refills: The float arm/cup drops with the water level, activating the fill valve. Fresh water enters the tank and also sends a small amount down the overflow tube to refill the bowl’s trapway.
- Fill Valve Shuts Off: As the water level rises to the set point, the float lifts, signaling the fill valve to shut off. The toilet is now ready for its next use.
Understanding this cycle is the first step in effective toilet troubleshooting.
The Running Toilet – The Most Common Culprit
The sound of a toilet constantly running or cycling on and off is not only irritating but also incredibly wasteful. It’s often the first sign that you need some serious toilet troubleshooting. A running toilet can waste hundreds of gallons of water per day, leading to significantly higher utility bills.
Diagnosing a Running Toilet
Before you grab your tools, let’s pinpoint the problem.
- Listen Closely: Is it a constant, subtle hiss, or does it refill intermittently for short bursts?
- The Dye Test: Add a few drops of food coloring to the toilet tank (not the bowl). Wait 15-20 minutes without flushing. If the colored water appears in the toilet bowl, you have a leak from the tank into the bowl. This is the most common type of running toilet.
Common Causes and Solutions for a Running Toilet
Most running toilet issues stem from one of three main components: the flapper, the fill valve, or the float.
Faulty Flapper (or Tank Ball)
This is by far the most common reason for a running toilet. Over time, rubber flappers can degrade, become stiff, or develop mineral buildup, preventing them from sealing completely.
- Toilet Troubleshooting Steps:
- Inspect the Flapper: Turn off the water supply valve (usually on the wall behind the toilet). Flush the toilet to empty the tank. Visually inspect the flapper. Does it look worn, warped, or covered in gunk?
- Check the Chain: Is the chain too long (getting caught under the flapper) or too short (preventing the flapper from sealing)? It should have about 1/2 inch to 1 inch of slack.
- Clean the Flapper Seat: Feel the rim of the flush valve opening (where the flapper rests). Is it rough or dirty? Use a non-abrasive scrubber to clean off any mineral deposits.
- Solution: Replace the Flapper: If the flapper is worn or cracked, it’s time for a replacement.
- Turn off the water supply and empty the tank.
- Detach the old flapper from the chain and the flush valve ears.
- Take the old flapper to Winstar Hardware to find an exact match. There are universal flappers, but a direct replacement is always best.
- Install the new flapper, ensuring the chain has the correct slack (no more than 1 inch).
- Turn on the water and test.
Faulty Fill Valve (Ballcock Assembly)
If the water level in the tank rises too high, water will continuously flow into the overflow tube, causing the toilet to run. This indicates a problem with the fill valve not shutting off properly.
- Toilet Troubleshooting Steps:
- Check Water Level: Is the water level in the tank reaching the top of the overflow tube? There’s usually a “fill line” marked inside the tank, typically about an inch below the top of the overflow tube. If the water is above this line, the fill valve is allowing too much water in.
- Check the Float: For older ballcock-style fill valves, the float ball might be cracked or filled with water, preventing it from floating correctly. For newer, tower-style fill valves, the float cup might be stuck or out of adjustment.
- Solution: Adjust or Replace the Fill Valve:
- Adjust the Float:
- Float Ball: Gently bend the float arm downwards a little bit to lower the water level.
- Float Cup: Most float cup-style fill valves have a small adjustment screw or clip on the vertical shaft. Turn the screw (clockwise to lower the water level) or release the clip to slide the float cup down. Aim for the water level to be about 1 inch below the top of the overflow tube.
- Replace the Fill Valve: If adjusting the float doesn’t work, or if the fill valve is old, makes noise, or is visibly damaged, replacement is the next step.
- Turn off the water supply and empty the tank.
- Disconnect the water supply line from the bottom of the fill valve.
- Unscrew the large nut holding the fill valve to the tank.
- Remove the old fill valve.
- Install the new fill valve, ensuring new washers are used and nuts are hand-tightened, then given a quarter-turn with a wrench.
- Reconnect the water supply line, turn on the water, and adjust the float for the correct water level.
- Adjust the Float:
Watch this video for a comprehensive visual guide on how to adjust a float cup on a modern fill valve.
Worn Tank-to-Bowl Gasket
This is less common for running into the bowl, but a worn gasket can cause leaks from the tank exterior, which might be mistaken for a running toilet if the water continuously drips into the drain.
- Toilet Troubleshooting Steps: Look for visible leaks between the tank and the bowl.
- Solution: Replace the tank-to-bowl gasket. This is a more involved repair as it requires removing the tank from the bowl. If you see water accumulating on the floor between the tank and bowl, it’s definitely a job for this gasket.
For more in-depth guidance on replacing specific toilet parts, check out our guide on “Essential Toilet Parts: A Guide to Replacements.”
The Weak Flush – When Your Toilet Isn’t Pulling Its Weight
A weak flush is frustrating and often embarrassing. It means your toilet isn’t clearing the bowl effectively, often requiring multiple flushes. This isn’t just an inconvenience; it can be a sign of issues that need prompt toilet troubleshooting.
Diagnosing a Weak Flush
A weak flush usually manifests as:
- Water slowly draining from the bowl.
- The toilet “double flushing” or needing a second flush to clear.
- Waste remaining in the bowl after flushing.
Common Causes and Solutions for a Weak Flush
Weak flushes typically point to problems with water volume, restricted flow, or blockages.
Insufficient Water in the Tank
For a powerful flush, the tank needs to release a specific volume of water rapidly.
- Toilet Troubleshooting Steps:
- Check Water Level: Is the water level in the tank reaching the “fill line” (usually an inch below the overflow tube)? If it’s too low, the toilet won’t have enough water for a strong siphon.
- Check the Flapper: Is the flapper opening fully and staying open long enough? If it closes too quickly, not enough water will enter the bowl. The chain might be too short or tangled.
- Solution: Adjust Water Level and Flapper Chain:
- Adjust Water Level: As detailed in the “Running Toilet” section, adjust the float mechanism on your fill valve to bring the water level to the proper height.
- Adjust Flapper Chain: Ensure the flapper chain has just enough slack (about 1/2 to 1 inch) to allow the flapper to open fully and then reseal properly.
Clogged Rim Jets or Siphon Jet
Over time, mineral deposits and grime can clog the small holes that push water into the bowl and initiate the siphon.
- Toilet Troubleshooting Steps:
- Inspect Rim Jets: Look under the rim of the toilet bowl. Do you see small, clogged holes?
- Inspect Siphon Jet: Look into the small hole at the very bottom of the toilet bowl. Is it clear?
- Solution: Clean the Jets:
- Rim Jets:
- Wear gloves.
- Carefully use a small piece of wire (like a coat hanger bent straight) or an Allen wrench to poke into each rim jet hole and dislodge buildup.
- Alternatively, pour a cup or two of white vinegar down the overflow tube in the tank. Let it sit for at least 30 minutes (or longer for severe buildup) to dissolve minerals. Flush. Repeat if necessary.
- Siphon Jet: Use a small piece of wire to clear any obstructions in the siphon jet.
- Rim Jets:
Partial Clog in the Trapway or Drain Line
Even if the toilet isn’t completely backed up, a partial clog can prevent the strong siphon action needed for a robust flush.
- Toilet Troubleshooting Steps: This is harder to visually diagnose. If the water drains slowly after cleaning the jets, a partial clog is likely.
- Solution: Plunge or Snake the Toilet:
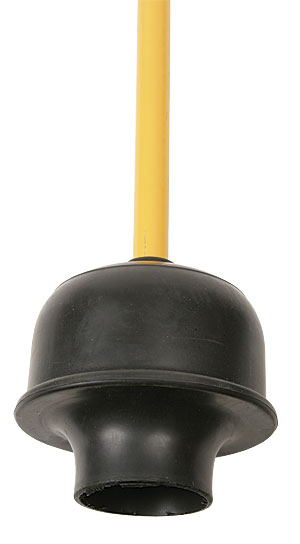
- Plunge: Use a good quality toilet plunger with a flange (the extra flap) that creates a tight seal around the drain hole. Give several firm, downward thrusts, maintaining the seal, then pull up sharply. Repeat several times.
- Toilet Auger/Snake: If plunging doesn’t work, a toilet auger (also called a closet auger) is designed to clear clogs without damaging the porcelain. Feed the auger’s cable into the toilet drain, crank the handle to extend the cable, and work it through the trapway until you hit the clog. Twist and push until the clog breaks up or you can pull it out.

Vent Pipe Issues
This is less common but can cause persistent weak flushing. A blocked vent pipe prevents air from entering the plumbing system, creating a vacuum that impedes drainage.
- Toilet Troubleshooting Steps: If you’ve tried everything else and still have a weak flush, and perhaps notice gurgling from other drains, a clogged vent pipe might be the issue.
- Solution: Clear the Vent Pipe: This is typically a job for a professional plumber, as it involves accessing the vent pipe on your roof.
The Phantom Flush – Ghosts in the Bathroom?
A “phantom flush” occurs when your toilet flushes itself without anyone touching the handle. It’s often startling and a definite sign that your toilet troubleshooting skills are needed. It’s essentially a subtle, slow leak from the tank into the bowl, similar to a running toilet, but the leak is so slow that the water level only drops enough to trigger the fill valve intermittently.
Diagnosing a Phantom Flush
- The Sound: You hear the toilet briefly refill, usually in the middle of the night or when the house is quiet.
- The Dye Test: This is the definitive test. Add food coloring to the tank water as described in the “Diagnosing a Running Toilet” section. Wait longer than for a regular running toilet (e.g., an hour or two, or even overnight if the flushes are very infrequent). If color appears in the bowl, you have a slow leak.
Common Causes and Solutions for a Phantom Flush
A phantom flush nearly always comes down to the same issue as a running toilet: a faulty flapper or fill valve.
Leaky Flapper
The most frequent culprit. Even a tiny imperfection or piece of debris can prevent a perfect seal.
- Toilet Troubleshooting Steps:
- Inspect Flapper: Turn off the water, flush, and inspect the flapper for wear, cracks, stiffness, or mineral buildup.
- Clean Flapper Seat: Thoroughly clean the rim where the flapper sits. Sometimes, just a small bit of sediment can prevent a good seal.
- Solution: Replace the Flapper: If cleaning doesn’t resolve it, replace the flapper following the steps in “Common Causes and Solutions for a Running Toilet” section. A new, supple flapper will create a much better seal.
Faulty Fill Valve
Less common for phantom flushes than a continuous run, but a faulty fill valve can sometimes allow very slow leaks or struggle to hold its shut-off position perfectly, leading to intermittent refills.
- Toilet Troubleshooting Steps: If you’ve ruled out the flapper, check the fill valve. Is the water level just on the edge of the overflow tube? Is the refill tube sometimes dripping into the overflow tube even when the tank is full?
- Solution: Adjust or Replace the Fill Valve:
- Adjust Water Level: Lower the water level slightly (1/2 inch below the fill line or overflow tube) to give the fill valve a clearer shut-off point.
- Replace the Fill Valve: If the fill valve is old, makes noise, or if adjusting doesn’t stop the phantom flush, replace it following the steps in the “Common Causes and Solutions for a Running Toilet” section.
Other Common Toilet Troubleshooting Issues
Beyond the big three, a few other minor (but annoying) issues can crop up.
Toilet Fills Slowly
A slow-filling toilet is irritating and can significantly delay bathroom availability in a busy household.
- Causes:
- Partially Closed Water Supply Valve: Check the shut-off valve on the wall behind the toilet. Make sure it’s fully open (turned counter-clockwise).
- Clogged Fill Valve Filter: Many fill valves have a small screen filter at the base where the water supply line connects. This can get clogged with sediment.
- Old/Faulty Fill Valve: Over time, the internal mechanisms of a fill valve can wear out, restricting water flow.
- Solutions:
- Open Supply Valve: Simply turn the handle fully.
- Clean Fill Valve Filter: Turn off the water, disconnect the supply line, and carefully remove and clean the small filter screen.
- Replace Fill Valve: If the valve is old and still fills slowly after cleaning the filter, a full replacement (see Common Causes and Solutions for a Running Toilet section) is usually the solution.
Toilet Not Flushing at All
This is usually a simple mechanical issue.
- Causes:
- Broken or Disconnected Handle/Chain: The most common culprit.
- Broken Flapper: If the flapper itself has come apart.
- Solutions:
- Reconnect/Replace Handle or Chain: Inspect the connection from the handle to the flapper chain inside the tank. Reattach if loose, or replace the handle assembly if broken.
- Replace Flapper: If the flapper is completely broken, replace it as per Common Causes and Solutions for a Running Toilet Section.
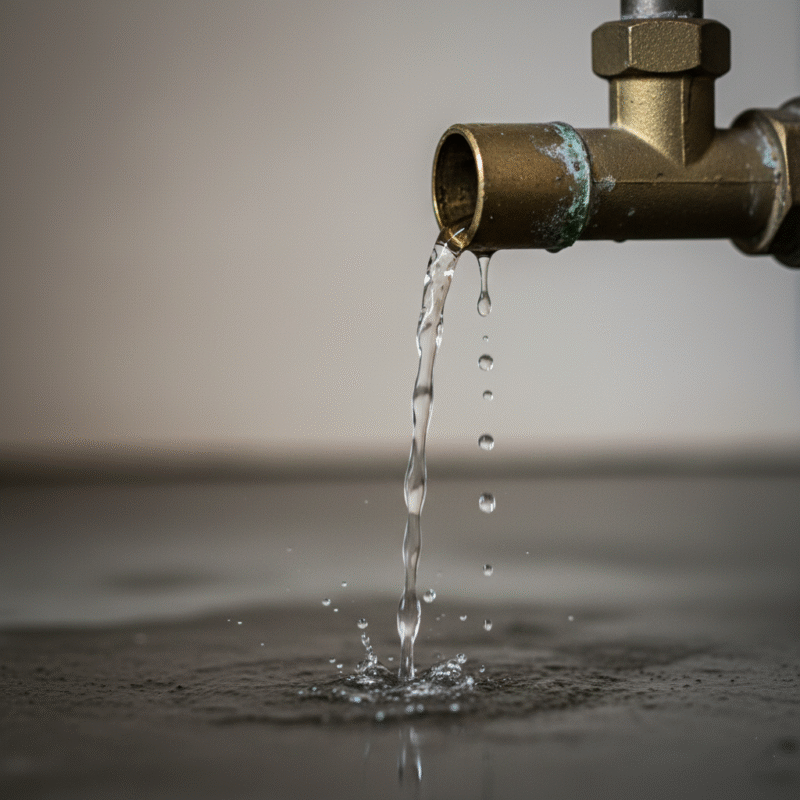
Toilet Base Leaking
A leak at the base of the toilet is serious and should be addressed immediately to prevent floor damage.
- Causes:
- Loose Tank Bolts: If the tank is leaking onto the floor via the tank-to-bowl connection.
- Failed Wax Ring: This is the most common cause of leaks from the base onto the floor. The wax ring creates a seal between the toilet and the drainpipe.
- Cracked Porcelain: A crack in the toilet bowl or tank.
- Solutions:
- Tighten Tank Bolts: Gently tighten the nuts on the underside of the toilet that secure the tank to the bowl. Do not overtighten, as this can crack the porcelain.
- Replace Wax Ring: This is a more involved DIY project. It requires shutting off water, emptying the toilet, disconnecting the water supply, unbolting the toilet from the floor, lifting the toilet, scraping off the old wax ring, installing a new one, and then reinstalling the toilet.
- Replace Toilet: If the porcelain is cracked, the toilet will need to be replaced.
Check out this tutorial from Ace Hardware for a detailed guide on how to replace a wax ring .
Essential Tools for Your Toilet Troubleshooting Toolkit
Having the right tools on hand makes any toilet troubleshooting task much easier and faster. You don’t need a huge arsenal, just these essentials:
- Adjustable Wrench: For tightening nuts on the water supply line and tank bolts.
- Pliers: Useful for gripping and turning various small parts.
- Screwdriver (Flathead & Phillips): For adjusting screws on fill valves or handle mechanisms.
- Toilet Plunger (with Flange): Essential for clogs. The flange helps create a better seal.
- Toilet Auger (Closet Auger): For deeper, more stubborn clogs that a plunger can’t handle.
- Old Towels/Rags: For catching spills and drips.
- Bucket: To empty the toilet tank and bowl.
- Utility Knife: For cutting parts or packaging.
- Wire Brush/Old Toothbrush: For cleaning mineral deposits.
- Gloves (Rubber/Latex): For hygiene.
- White Vinegar: An excellent natural de-scaler and cleaner.
Conclusion: Empowering Your Toilet Troubleshooting Skills
You’ve now armed yourself with the knowledge and confidence to tackle most common toilet problems. From the ceaseless drip of a running toilet to the frustrating inefficiency of a weak flush, and even the eerie mystery of a phantom flush, you have the know-how for effective toilet troubleshooting.
Remember, while many fixes are simple DIY projects, don’t hesitate to call a professional plumber if you encounter complex issues, persistent leaks, or feel uncomfortable with a repair. At Winstar Hardware, we stock a wide range of high-quality toilet repair parts, from flappers and fill valves to wax rings and replacement handles. Our expert staff is always ready to assist you in finding the right components for your specific toilet and answer any further questions.
Say goodbye to wasted water and annoying sounds. With this guide, you’re well on your way to a perfectly functioning, silent, and efficient toilet!


One thought on “Ultimate Toilet Troubleshooting: Your Guide to Fixing Running, Weak, and Phantom Flushes.”