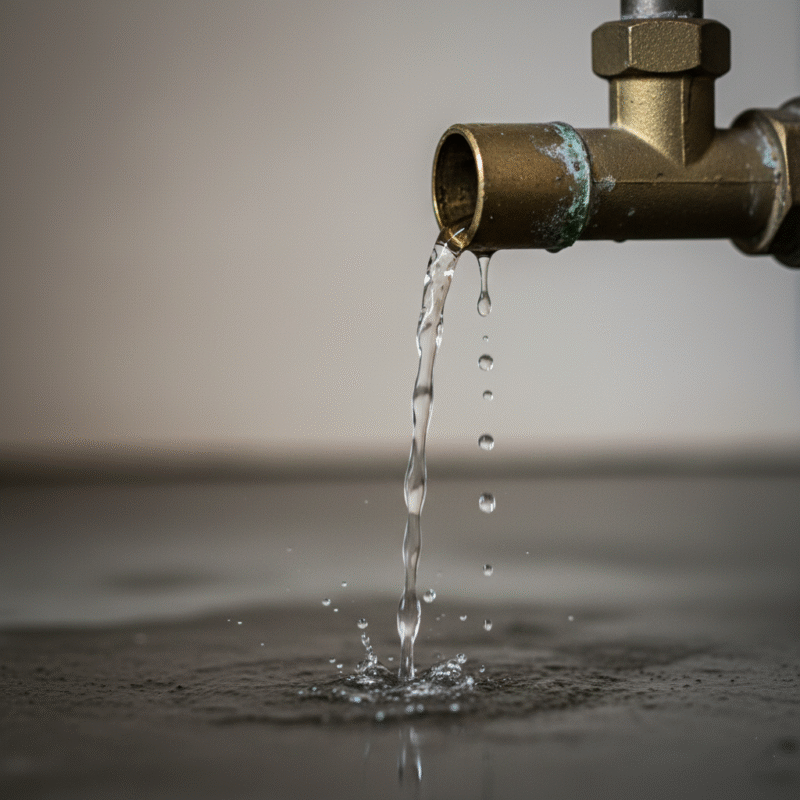
The roar of a new project is an exciting sound! You’re finally getting that extra bathroom, the spacious kitchen you’ve always wanted, or a dedicated laundry room. A home addition is a fantastic investment, but before you start picking out tiles and paint colours, there’s one critical, often-overlooked, element that will determine your project’s success or failure: plumbing for home addition.
In the Kenyan context, where we frequently deal with fluctuating water pressure, diverse material standards, and specific county regulations, the challenge is even greater. Skimping on the planning phase for your new water supply or drainage system can lead to costly leaks, low pressure in your shower, or persistent clogs down the line—nightmares that no homeowner wants to face.
At Winstar Hardware, we understand that a robust and reliable water system is the backbone of any new structure. This comprehensive guide will walk you through every critical stage of adding new plumbing to an existing home. From deciphering Kenyan plumbing regulations to mastering the art of connecting new plumbing to existing system pipes, we cover it all. We will show you how to properly plan your water supply extension and execute your drainage system planning with precision, ensuring your new space functions flawlessly from day one.
Whether you are engaging a professional contractor or tackling the DIY home extension plumbing yourself, meticulous preparation is key. Use this guide as your blueprint to confidently source the correct Winstar hardware plumbing materials and install a system that meets all current standards. Let’s dive into how to turn that stressful plumbing task into the solid, dependable foundation of your beautiful new home addition.
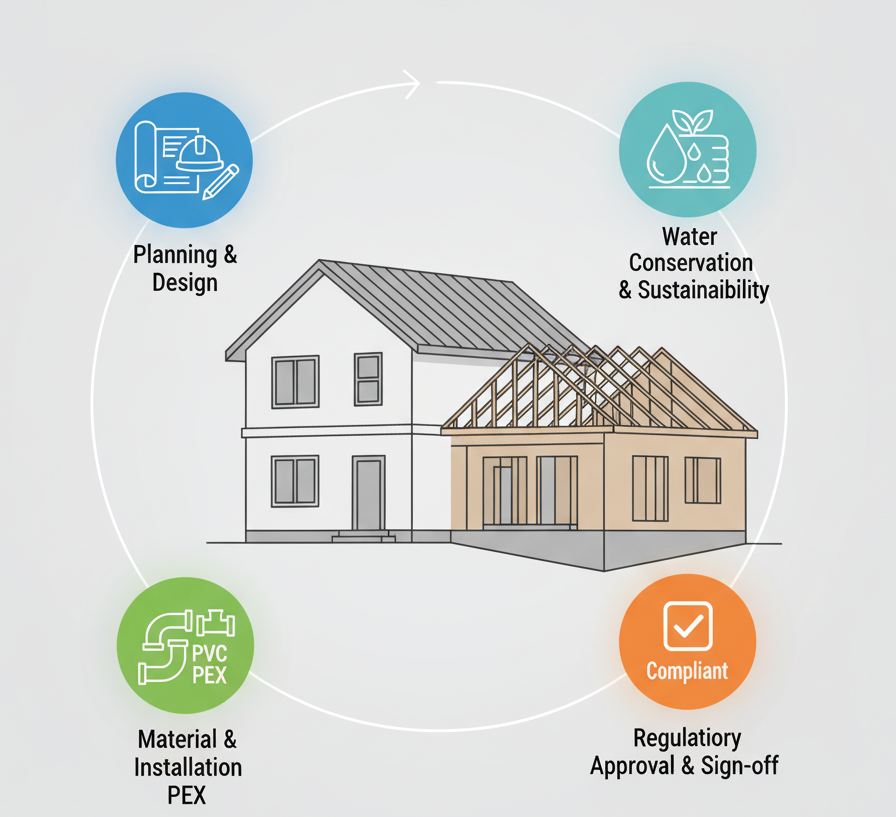
The Planning Phase – Measure Twice, Cut Once
The excitement of your new extension can often distract from the vital groundwork. In plumbing, planning is not just important—it is the difference between a system that runs silently and efficiently for decades and one that plagues you with poor pressure and constant blockages. Before you even touch a pipe or visit the Winstar Hardware store, you must have a clear, accurate, and calculated plan.
The successful implementation of plumbing for home addition starts right here, on paper, where mistakes are cheap and easy to fix.
Needs Assessment: Mapping Your New Water World
Your first step is to visualize and document your new addition’s plumbing needs, starting with a basic map of your property.
Inventory of Fixtures
Write down every single item that will use water or drain waste in the new space. This is crucial for calculating the overall plumbing load later.
| New Space | Fixture | Water Supply (Yes/No) | Drainage (Yes/No) | Notes |
| New Bathroom | Toilet (WC) | Yes | Yes | High flow, 3-inch drain required |
| Shower/Bath | Yes | Yes | Requires consistent hot/cold pressure | |
| Lavatory (Sink) | Yes | Yes | Low flow, smaller drain | |
| New Laundry | Washing Machine | Yes | Yes | High instantaneous cold/hot water draw |
| New Kitchenette | Kitchen Sink | Yes | Yes | Potential for grease/food waste |
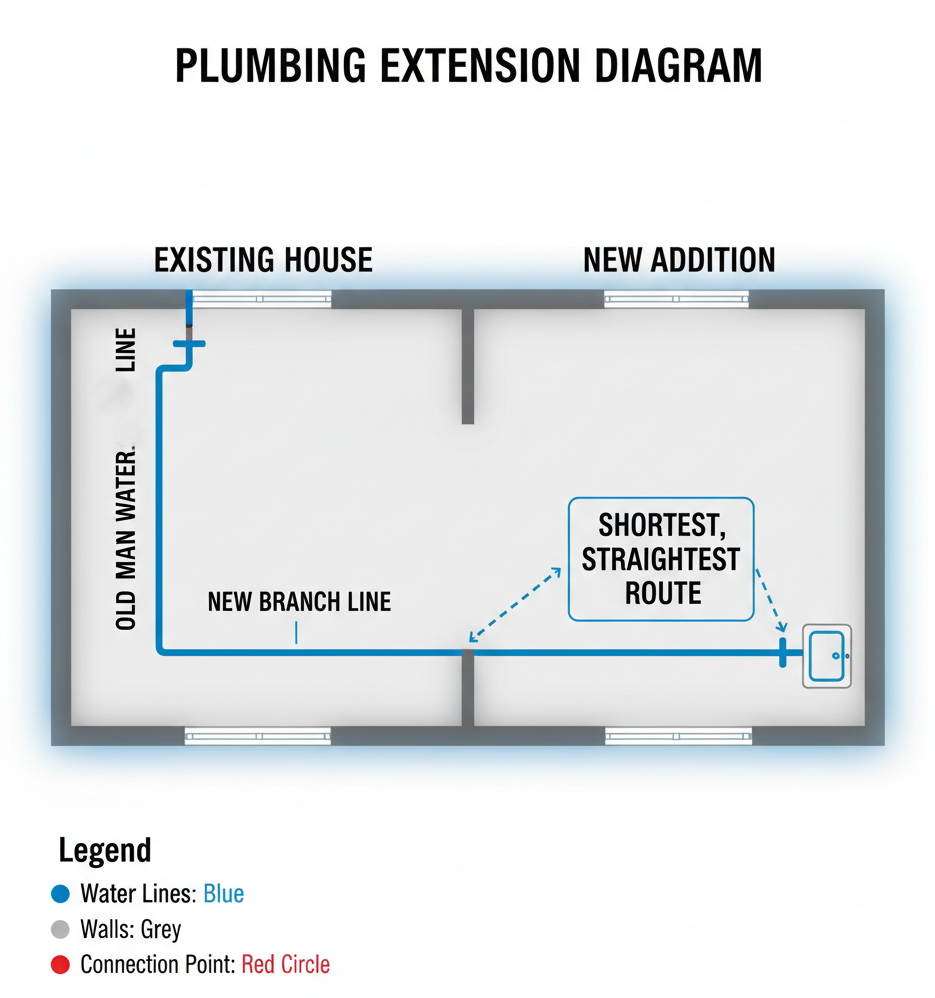
Locating Connection Points (Tapping the Existing System)
The most critical part of connecting new plumbing to existing system is finding the right places to tap in.
- Main Water Supply: Identify the main supply line coming into your existing house (usually near the water meter or the storage tank/pump). Ideally, tap the new line for your extension as close to the source as possible to maintain maximum pressure and volume for both the old and new fixtures.
- Main Drainage/Sewer Line: Locate your main 110mm soil stack or the exit point to your septic tank or municipal sewer. The new drain lines must run downhill, under gravity, to connect to this main line.
Load Calculations: The Fixture Unit (FU) Method
To prevent the dreaded “Kenyan drip” (low water pressure when multiple taps are running), you must correctly size your pipes. The standard method used by professionals is the Fixture Unit (FU) concept. An FU is a measure of the probable demand a fixture places on the plumbing system.
You must calculate two types of FU:
- Water Supply Fixture Units (WSFU): Determines the required size of your pressurized inlet pipes (cold and hot water).
- Drainage Fixture Units (DFU): Determines the required size of your drainage pipes (waste and soil).
Table: Common Fixture Unit Values (DFU)
While specific codes vary, the following DFU values provide a reliable baseline for design in Kenya:
| Fixture | DFU Value (Approx.) | Minimum Trap Size (mm) |
| Water Closet (Toilet) | 3.0 | 75mm (or 110mm main) |
| Bathtub/Shower | 2.0 | 50mm |
| Lavatory (Sink/Washbasin) | 1.0 | 40mm |
| Kitchen Sink (Domestic) | 2.0 | 50mm |
| Washing Machine | 3.0 | 50mm |
| Floor Drain | 2.0 | 75mm |
| Total DFU for New Bathroom (WC, Shower, Sink): | 6.0 |
The Goal: Sum the DFUs for all new fixtures. Then, use a pipe sizing chart (like the one below) to ensure the main branch line for your new addition can handle the combined load.
Table: Drainage Pipe Sizing Guideline (Based on Total DFU)
| Nominal Pipe Size (Diameter) | Maximum DFU (Horizontal Branch) | Recommended Minimum Slope (Fall) |
| 40mm (1.5 inch) | 3 | 1 in 50 (2%) |
| 50mm (2 inch) | 6 | 1 in 50 (2%) |
| 75mm (3 inch) | 20 | 1 in 50 (2%) |
| 110mm (4 inch) | 216 | 1 in 48 or 1 in 60 (approx. 2.1% to 1.6%) |
Winstar Pro Tip: For most new residential additions involving a single bathroom or laundry, a 50mm branch line for all waste (sinks, showers) connecting to the existing 110mm main is sufficient. However, the toilet (WC) must connect directly to a 75mm or 110mm line. This diligence in sizing is key to successful plumbing for home addition.
The Power of Gravity: Planning the Drainage Fall
In East Africa, virtually all drainage runs on gravity. This means your pipes must have a continuous downhill slope (known as the fall or gradient) from the fixture to the main line, septic tank, or sewer connection. If the fall is too shallow, waste will sit in the pipes; if it’s too steep, the water will run away too fast, leaving the solids behind to cause a blockage.
- The Golden Rule: The standard minimum required fall for soil and waste pipes in Kenyan plumbing is generally 1 in 50 or 2%. This means for every 50mm of horizontal run, the pipe must drop by 1mm vertically.
- Practical Calculation: If your new bathroom is 5m (5000mm) away from the existing main drain, the pipe needs to drop by at least:
5000 mm/50=100 mm
You must ensure you have at least 100mm of vertical space to accommodate this slope before you reach the main line connection point.
This meticulous drainage system planning ensures wastewater and soil travel smoothly, reducing the risk of costly excavation to fix blockages later. By nailing down these measurements and calculations, you establish a solid foundation for the rest of your plumbing for home addition project.
Navigating Kenyan Regulations and Permits
In Kenya, jumping into construction without the necessary paperwork can result in heavy fines, demolition orders, or costly rework. For your plumbing for home addition project, compliance with local codes and authorities is non-negotiable. This section guides you through the bureaucratic landscape, ensuring your project meets all Kenyan plumbing regulations.
The Permit Requirements: Your License to Build
Any significant alteration or extension to a residential property typically falls under the jurisdiction of the County Government (e.g., Nairobi City County, Kiambu County, etc.) and is guided by the National Building Code 2024.
The Plumbing Permit
While the main Building Permit covers the overall structure, a major home addition usually requires specific sub-approvals, including a Sanitary/Plumbing Permit. This confirms your water and drainage layout adheres to the required standards.
What You Need to Submit (Often via a Licensed Professional):
- Approved Architectural Plans: Showing the new floor area, which triggers the need for a permit.
- Plumbing Plans (Schematic Drawings): Detailed layouts of the proposed pipes, fittings, fixtures, and points of connection to the existing system. This includes the calculated DFU load from Section 1.
- Professional Sign-Off: All construction plans, including plumbing, must be prepared and signed by registered professionals (Architects and/or Engineers) who are licensed by their respective boards (e.g., EBK, BORAQS).
The Role of NEMA (National Environment Management Authority)
NEMA might not require direct approval for a specific plumbing change for most standard single-unit residential extensions. However, NEMA’s scope is essential for two key areas:
- Large Projects: If your addition is part of a larger, high-cost development, or if it significantly alters the environmental footprint (e.g., major changes to storm water drainage or a complex new waste treatment system).
- Effluent Discharge/Septic Tanks: NEMA regulates the discharge of effluents. If your project involves a new septic tank connections Kenya or soak pit, the design and location must comply with environmental standards to prevent groundwater contamination.
Winstar Pro Tip: Always consult your County Planning Office or a licensed project consultant. They will confirm exactly which local by-laws and NEMA requirements apply to your specific plot and size of extension.
Engaging the Right Professional: Licensed Plumbers
In many Kenyan counties, a licensed plumber or drain-layer must carry out plumbing installation for new or modified structures.
- Expertise and Compliance: A licensed plumber is familiar with the latest Kenyan plumbing regulations, including pipe sizing (DFU/WSFU calculations), required slopes, minimum trap depths, and venting requirements (which prevent sewer gases from entering your home).
- Accountability: Hiring a licensed professional adds a layer of accountability. Should the work fail to meet the standards during an inspection, they are responsible for fixing it.
Table: Why Use a Licensed Plumber for Your Extension
| Aspect | DIY Plumbing | Licensed Plumber |
| Code Compliance | Risk of violation, leading to rework/fines. | Ensures adherence to the National Building Code. |
| Material Quality | May use non-standard or sub-par materials. | Must use K-Standard quality materials (available at Winstar Hardware). |
| Sizing Accuracy | Guesswork, leading to low water pressure or clogs. | Uses technical standards (DFU/WSFU) for optimal sizing. |
| Inspection Pass | High risk of failing “rough-in” inspection. | Guides the process to ensure all inspections are passed. |
Dealing with Water and Sewer Authorities
The final bureaucratic step is coordinating the actual physical connection with the utility provider, such as the Nairobi City Water and Sewerage Company (NCWSC) or the equivalent body in your area.
- Water Connection: You must apply for a formal connection to the main water line for your water supply extension. The utility provider will often inspect the tapping point and the meter area to ensure no one makes illegal connections (known as siphoning or tapping). This process often begins with a site survey and estimate.
- Sewer Connection: If you are in a sewered area, you need a Sewer Connection Permit. The authority will specify the location and depth for connecting your new drain line to the public sewer. Never connect a private drain to a public sewer without explicit, written permission; doing so is illegal and can result in severe penalties.
The Inspection Stages
The true test of your plumbing for home addition plan is surviving the inspection process. There are two main checks:
- Rough-In Inspection: This happens before any pipes are covered up by walls or concrete. The inspector checks pipe sizes, joints, the drainage slope, and the venting system. If you fail this, your project stops until corrections are made.
- Final Inspection: This occurs after all fixtures (taps, toilets, showers) are installed. The inspector checks water pressure, flow rates, proper sealing of drains, and overall functionality before signing off on the occupation certificate.
By respecting the process and using certified plans and professionals, you ensure your new extension is not just beautiful, but legally compliant and built to last.
Plumbing Installation and Technical Standards
This section covers the practical execution of the plumbing works, focusing on the selection of materials appropriate for the Kenyan climate and construction environment, and the technical standards for installation to ensure a durable and efficient system.
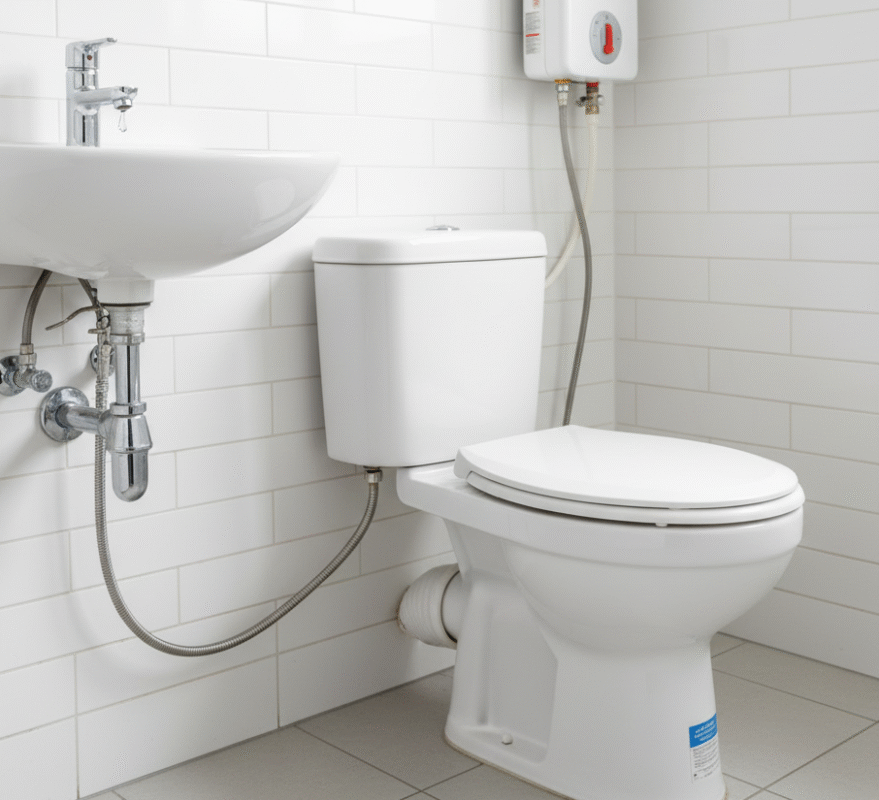
Water Supply System: Materials and Installation
The water supply system includes the potable cold water and the hot water distribution lines. The choice of material is critical for water safety and system longevity.
Material Selection
| System Use | Recommended Material (Kenya Context) | Key Installation Method | Rationale & Standard |
| Hot & Cold Water (Internal) | PPR (Polypropylene Random Copolymer) | Heat Fusion (Welding) | High heat resistance (up to 95°C), non-toxic (food-grade), durable, and long lifespan (up to 50 years). Creates seamless, leak-proof joints. |
| Cold Water Supply (External/Main) | HDPE (High-Density Polyethylene) or uPVC (Unplasticized PVC) | Compression Fittings / Solvent Cement | Durable, UV-resistant (especially HDPE for surface laying), and cost-effective for larger main lines. |
| Alternative Hot/Cold | CPVC (Chlorinated PVC) | Solvent Cement | Excellent chemical and heat resistance, easier to install than PPR (no specialized fusion machine required). |
Installation Guidelines for Water Pipes
- Pipe Sizing: The diameter of your pipes (e.g., 20mm, 25mm, 32mm) must correspond directly to the flow rates determined by the WSFU (Water Supply Fixture Unit) calculations performed in Section 1. Smaller pipes restrict flow and lower pressure.
- PPR Installation (Heat Fusion): This process requires specialized equipment and skill. Simultaneously heat the pipe end and the fitting socket, then immediately press them together to create the joint. This forms a homogeneous, permanent, and leak-proof weld.
- uPVC/CPVC Installation (Solvent Cement): Joints must be cleaned and primed, followed by an even application of the correct solvent cement to both the pipe and the fitting. The pieces are immediately pushed together and held momentarily to allow the cement to fuse the materials chemically.
- Minimizing Joints: Plan the layout to minimize the number of fittings (elbows, tees) to reduce friction loss and potential leak points.
- Thermal Expansion: Use clips and supports that allow for slight movement, particularly for hot water lines, to accommodate the thermal expansion of the material.
Drainage, Waste, and Vent (DWV) System
This system uses gravity to safely move soil water (sewage from toilets) and waste water (greywater from sinks, showers) to the septic system or municipal sewer, while providing a clear air path (venting).
Material Selection
- Drainage (Soil & Waste): uPVC or Mu PVC (Sewerage Grade, typically 110mm diameter for soil pipes and 50mm for waste pipes). These pipes are rigid and corrosion-resistant.
Key Technical Requirements (Based on Kenya Building Code – CAP. 242)
A. Gradient (Slope)
Lay all horizontal drainage pipes at a uniform slope (gradient) to ensure self-cleansing velocity. If the slope is too shallow, solids settle; if too steep, water runs too fast, leaving solids behind.
- Standard Practice Guideline:
- Small Pipes (e.g., 50mm/2″): Minimum slope of 1:40 (2.5%).
- Large Pipes (e.g., 110mm/4″): Minimum slope of 1:60 (1.67%). (Note: Always verify specific gradient requirements with your licensed professional engineer, as mandated by the National Construction Authority (NCA).)
B. Trapping and Access
- Traps: Every sanitary fitting (sink, shower, WC) must be fitted with a trap to maintain a water seal, preventing foul air (sewer gases) from entering the building.
- Gullies: Waste water pipes (from sinks, baths) must discharge into an external gully trap before connecting to the main drain. Soil pipes (from WCs) connect directly to the main drain.
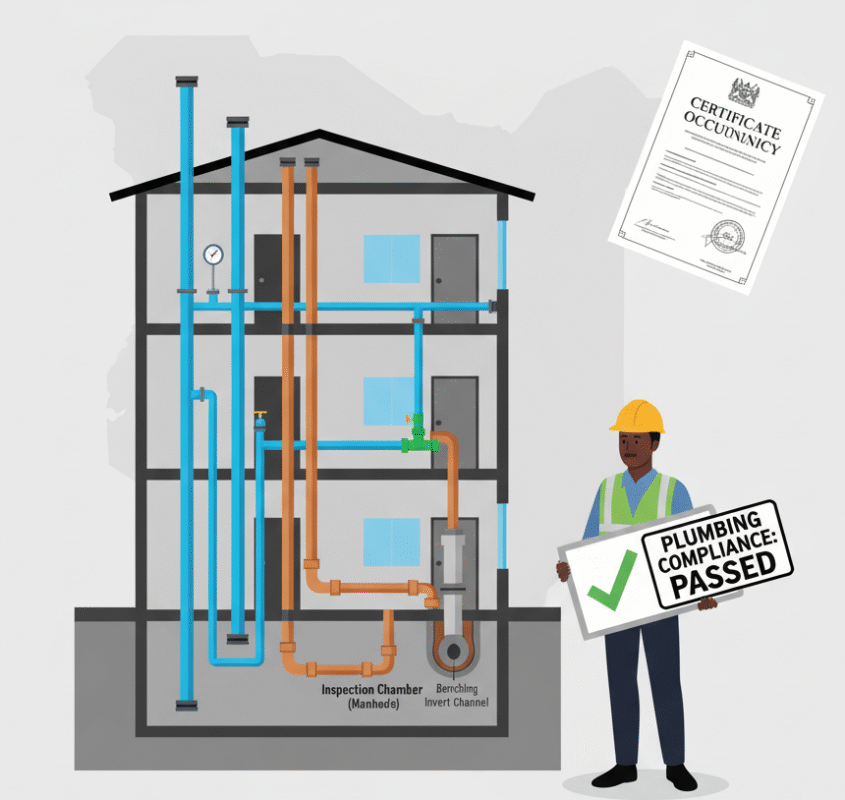
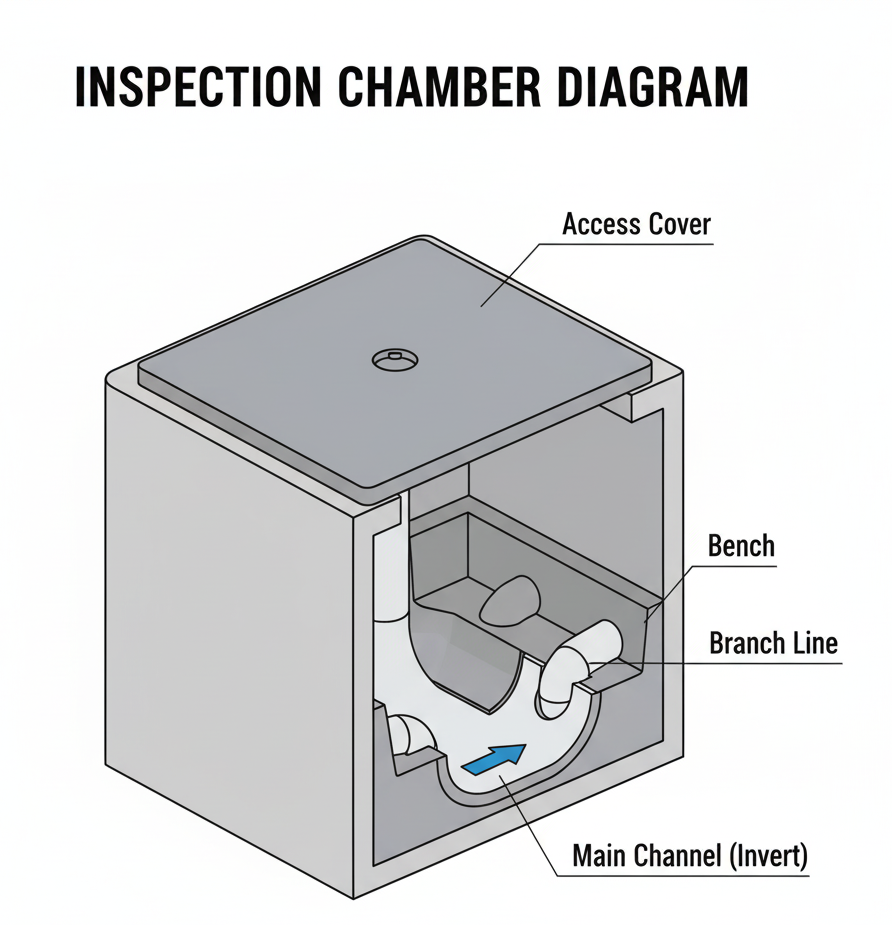
- Manholes/Inspection Chambers: These must be provided at every change in direction, change in pipe size, or junction point of the underground drains to allow for inspection and cleaning.
C. Venting (The Anti-Syphonage System)
Vent the DWV system to the atmosphere to protect the water seals in all traps.
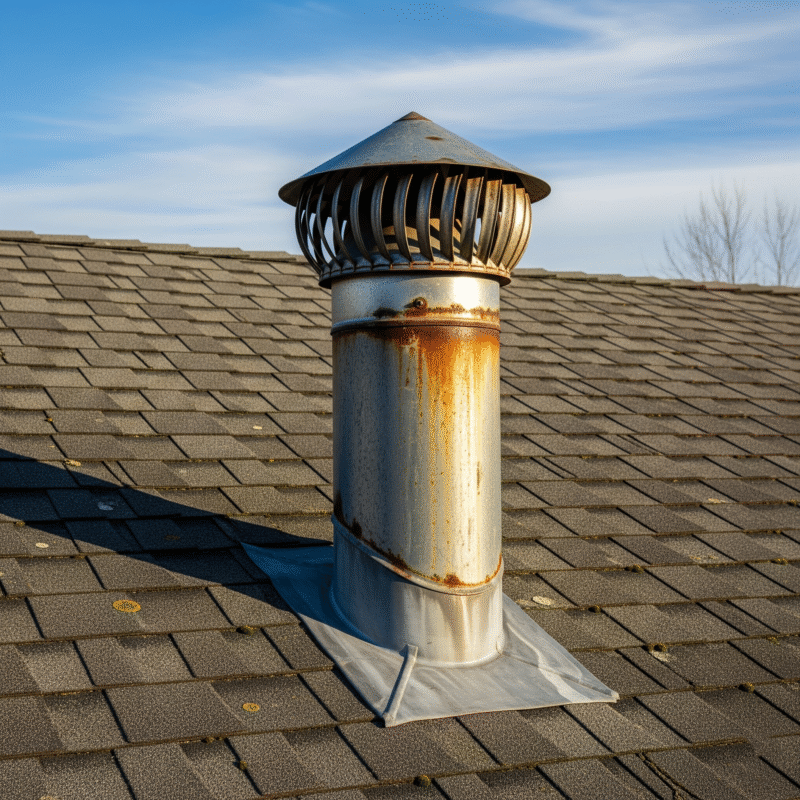
- Ventilating Pipe (VP): A pipe (usually 50mm or 75mm) connected to the main drain and running vertically up above the roofline. It serves two purposes:
- Allows sewer gases to escape safely.
- Admits fresh air into the system.
- Anti-Syphonage Pipes: These are secondary vents connected to the waste pipe traps to prevent two conditions that can break the water seal:
- Self-Syphonage: Water flowing down its own pipe creates a vacuum, sucking the trap dry.
- Induced Syphonage: Water flowing down a main soil pipe creates a negative pressure wave that sucks the seal out of a nearby trap.
- The Kenya Building Code requires Anti-syphonage pipes to soil-pipes (CAP. 242, Section 39).
Final Testing and Compliance
Once the system is installed but before it is covered up (in walls or trenches), it must be tested and approved by the local authority or the supervising engineer.
- Drainage Air Test: The National Building Code mandates that completed drainage lines (after partially back-filling) be subjected to an Air Test.
- Procedure: All traps are filled with water, and the open ends of ventilating pipes are plugged. Air is pumped into the drain under a pressure of at least 0.35 kPa (35 mm head of water). The system must hold the pressure for a specified time, indicating no leaks.
- Water System Pressure Test: The cold and hot water lines are pressurized (typically 1.5 times the maximum working pressure) and monitored over a period to check for any drops in pressure, which would indicate leaks.
- Certification: A Certificate of Completion must be issued by the licensed professional and approved by the local authority after all tests have passed. Do not cover up any pipework until this approval is officially granted.
System Integration, Testing, and Long-Term Maintenance
This section details the critical steps for safely and effectively integrating your new plumbing into the existing home system and establishing a long-term maintenance schedule.
Integration of Water and Drainage Lines
The connection of your new system to the existing mains requires precision, particularly for the drainage system, to maintain efficiency and prevent clogs or backups.
Water Supply Connection
- Identify the Main Line: Locate the primary water supply line leading into the property.
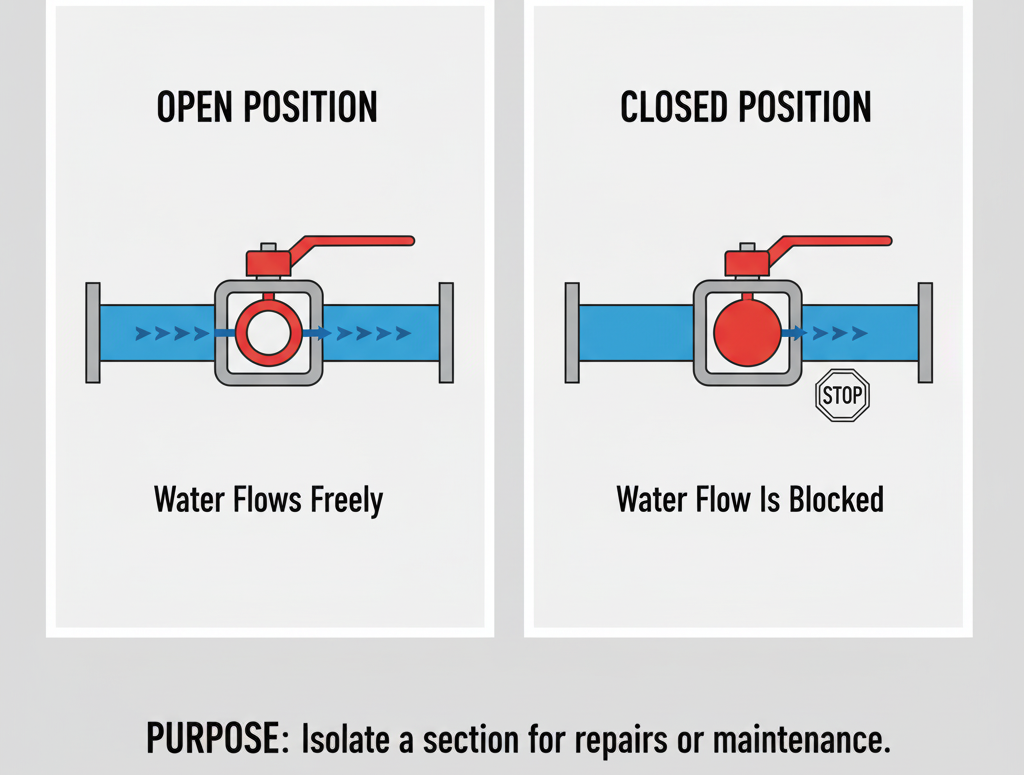
- Installation Point: The new line for the addition should be tapped off the main supply, ideally with a dedicated shut-off valve installed to allow for isolating the addition’s water supply during future maintenance or emergencies without shutting off the whole house.
- Pressure Management: Inspect the existing system’s Pressure Reducing Valve (PRV), if one is installed. Water pressure should ideally be between 40 and 60 psi (pounds per square inch). High pressure can stress the new piping and fixtures.
Drainage System Integration
The method for connecting your new soil and waste pipes depends entirely on the existing disposal system.
| System Type | Connection Procedure | Key Requirements |
| Septic Tank | Connect the new drain line to the main line feeding the septic tank. It is highly recommended to install an inspection chamber at the junction point to provide easy access for maintenance and to prevent blockages. | The new pipe must maintain a minimum slope of 1:60 (Building Regulation standard) and be properly sealed. Ensure all joints are watertight to prevent leaks into the soil. |
| Municipal Sewer | The connection to the public sewer line is usually made at an existing manhole or a specified tapping point. In Nairobi, connections to the public system must be made by the Water Company after the internal plot drain is completed and approved. | Approvals: You must have approved drawings from the Water Service Provider (e.g., NCWSC) showing the invert levels and plans. |
| Manhole Connection | If connecting to an existing manhole, the new pipe must enter the manhole’s channel (invert) at an angle of 90° or less, flowing in the same direction as the existing main flow. A short, flexible section known as a rocker pipe should be used at the connection point to the manhole to absorb slight ground movement. | The connection should use a proper benching fitting (branch channel) and be sealed with a granolithic or waterproof mortar to ensure a smooth flow and prevent splashing or debris build-up. |
System Testing and Final Handover
Before the plumbing is hidden by walls, floors, or backfill, a rigorous testing and inspection phase is mandatory.
Water System Pressure Test (Hydrostatic Test):
- Fill the entire water supply system (both hot and cold) with water, and pressurize it, typically to 1.5 times the system’s working pressure (or as per local authority requirement), and hold it for a specified duration (e.g., one hour).
- A loss of pressure indicates a leak; immediately locate and repair it before sealing the system.
Drainage System Water Test:
- Seal the completed drainage pipe sections at the low end (manhole or septic tank connection), and then fill them with water up to the highest point or a specific level (e.g., ground level or a 10 ft head of water).
- Mark the water level, and it must hold for a defined period (e.g., two hours) without dropping significantly.
Final Inspection:
- After all tests pass, a certified plumber and, if required, the local Water Service Provider or County inspector must inspect and sign off on the plumbing installation before backfilling the trenches or covering internal works.
Long-Term Preventive Maintenance
A routine maintenance schedule protects your investment and prevents costly repairs.
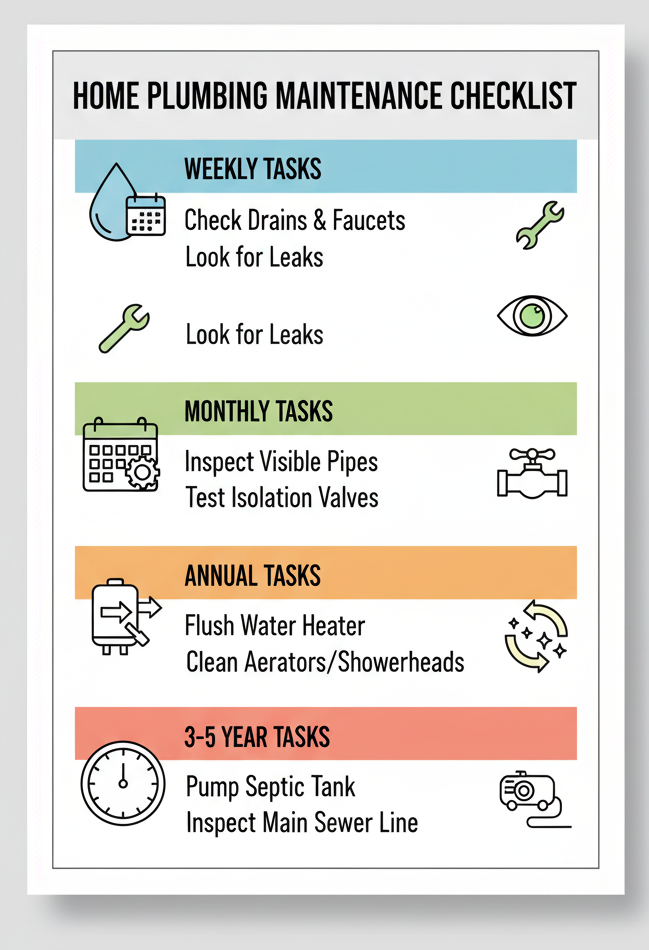
| Frequency | Task | Purpose |
| Weekly | Check Drains and Faucets: Ensure all drains flow quickly with a full swirl. Check faucets and toilet bases for leaks. | Spotting slow drains or small leaks before they become major clogs or water damage. |
| Monthly | Visual Pipe Inspection: Inspect all visible pipes (under sinks, in service ducts) for signs of corrosion (green/white deposits on copper, rust on steel) or damp patches. | Catching material degradation early. |
| Quarterly | Clean Aerators/Showerheads: Remove and soak faucet aerators and showerheads in white vinegar to dissolve mineral/calcium buildup. | Maintaining good water flow and pressure. |
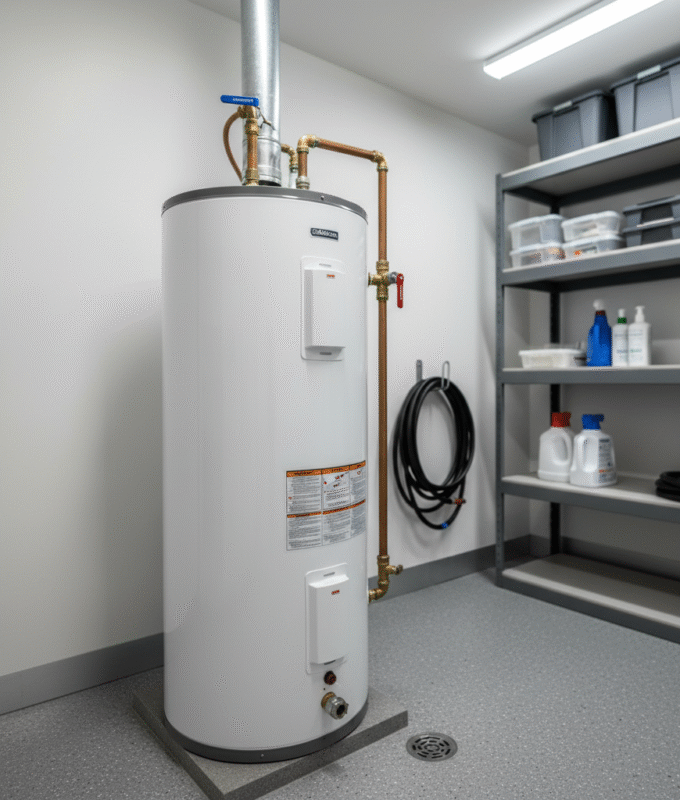
| Annually | Water Heater Service: Have a professional drain and flush the storage water heater tank to remove sediment buildup, which improves efficiency and prevents corrosion. | Extending the lifespan and efficiency of the water heater. |
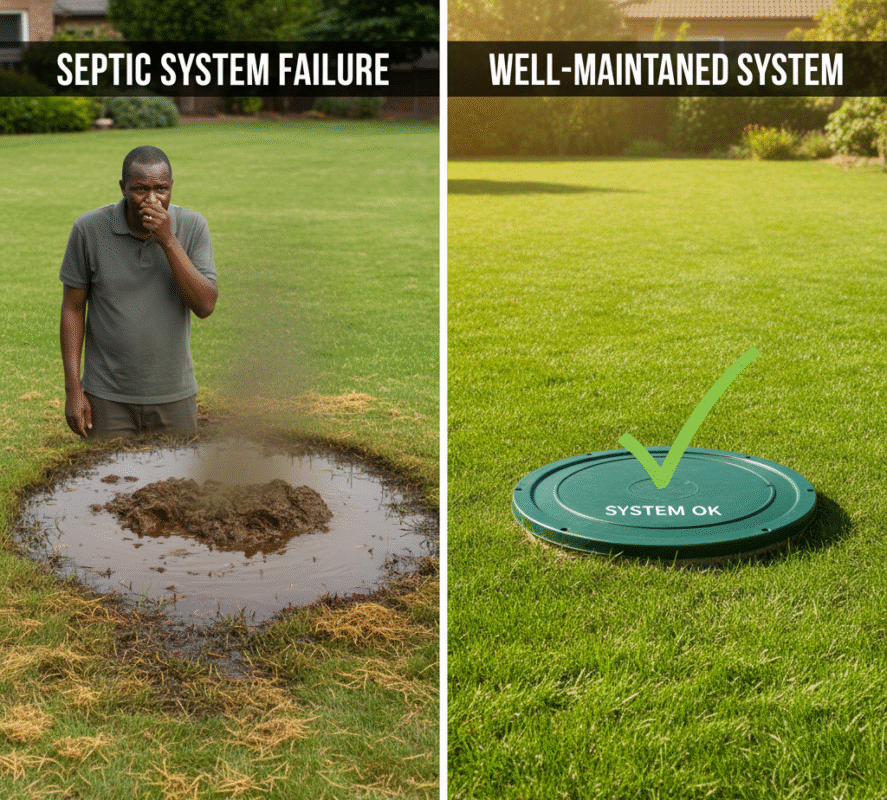
| Every 3-5 Years | Septic Tank Pumping: If on a septic system, have the tank professionally pumped. | Preventing the buildup of solids that can block the outlet or damage the drain field. |
The video below discusses the technical aspects of connecting a new drain to an existing drain line, including the use of saddles and appropriate pipe fall. Connecting New Drain to Existing Drain
Troubleshooting, Cost Management, and Project Finalization
This section addresses practical issues that arise post-installation, strategies for managing costs throughout the project, and the essential steps required for formal project sign-off and receiving an Occupancy Certificate in Kenya.
Common Troubleshooting and Professional Intervention
Even with meticulous planning, plumbing issues can occur. Knowing how to identify and address them quickly is key to preventing long-term damage and excessive repair costs.
| Issue | Common Cause (Kenya Context) | DIY Fixes | When to Call a Licensed Plumber |
| Clogged Drains/Toilets | Grease, hair, or inappropriate flushing, sometimes tree root infiltration into sewer lines. | Use a plunger, a drain snake, or a baking soda/vinegar mixture for minor clogs. | If the clog persists, if multiple fixtures are backing up simultaneously, or if you notice sewage odours or gurgling sounds from unaffected drains (indicating a main sewer line blockage). |
| Leaky Faucets/Pipes | Worn-out rubber washers or O-rings in fixtures; corrosion in older metallic pipes; poor fitting during installation. | For faucets, replace the internal washer/O-ring (use a repair kit). For minor pipe leaks, temporarily use a clamp or plumber’s tape/epoxy putty and shut off the main valve. | If the leak is behind a wall or under a slab, if it’s a burst pipe, or if a fixture repair fails (indicating a deeper issue with the valve or pipe thread). |
| Low Water Pressure | Sediment/mineral buildup in the aerator (tip of the faucet) or showerhead; a leak in the main supply line; a faulty pressure pump/regulator. | Clean or replace aerators by soaking them in vinegar overnight. Check that all valves (including the main one) are fully open. | If pressure is low throughout the entire home, or if cleaning the aerators doesn’t resolve the issue (suggesting a main line leak, pump issue, or pressure regulator fault). |
| Sewer Odours | A dried-out P-trap (allowing sewer gas to vent into the house) or a blocked/faulty vent pipe. | Run water in seldom-used fixtures to fill the traps. Pour a small amount of cooking oil into floor drains to slow water evaporation. | If the odour persists, which may indicate a main sewer line blockage (e.g., from tree roots) or a disjointed/cracked pipe allowing gas to escape. |
Cost Management Strategies
To ensure your plumbing budget remains on track for the home addition:
Prioritize the Existing Footprint:
The most significant cost in replumbing is rerouting major lines (sewer, main supply, and vent stacks). Keep new fixtures (toilets, sinks) as close as possible to the existing main vertical drain pipes to minimise the trenching and piping required.
Strategic Material Choice:
- Piping: Where code allows, consider using PEX (cross-linked polyethylene) piping for water supply lines instead of copper. PEX is generally less expensive, requires fewer fittings due to its flexibility, and is often quicker to install.
- Fittings: For connections, opt for crimp-fit (which requires a crimping tool) over the more expensive push-fit fittings. Discuss this with your contractor as push-fit is faster but significantly more costly per unit.
Procurement:
Work closely with your plumber on the Bill of Quantities (BQ) and agree on the source of materials. Buying in bulk or purchasing fixtures/fittings directly from a wholesaler yourself, rather than relying on the contractor’s retail margin, can lead to substantial savings.
Avoid Unnecessary Upgrades:
Refinish old, functional plumbing fixtures (like bath tubs or sinks) where possible, instead of opting for complete replacement, which saves on demolition, disposal, and new material costs.
Project Finalization and County Sign-Off
The final step in your project is obtaining the legal authorization to occupy the structure, which requires proving that the plumbing work meets all Kenyan standards.
Contractor Sign-Off and Warranties:
- Completion Certificate: Your plumbing contractor should issue a Certificate of Completion for their scope of work, confirming that the installation adheres to the approved designs and building standards.
- Retention/Defects Liability Period: A small percentage of the contract sum (usually 5–10%) should be withheld as retention. This amount is typically paid after a Defects Liability Period (e.g., 6 months to 1 year), during which the contractor is responsible for fixing any defects that arise.
The Plumber’s Certificate (Occupancy Requirement):
- As part of the documentation for the Occupancy Certificate from the County Government, you will be required to submit a Plumber’s Certificate.
- This is a formal document, signed by the Registered Plumber, certifying that the entire plumbing and drainage system has been installed correctly, is in good working order, and complies with local by-laws and the approved plans.
Final County Inspection:
- Once construction is complete, the developer (homeowner/project manager) must request a Final County Inspection.
- Inspectors from the County’s relevant departments (Planning, Health, Environment, and often the NCA) will check the building to ensure it conforms to the approved architectural and structural plans, including the provision and functionality of the water supply and waste disposal systems.
Successful completion of this final inspection, along with all supporting documentation (including the Plumber’s Certificate and Architect/Engineer’s supervision letters), leads to the issuance of the Occupancy Certificate, legally finalizing the home addition project.
Sustainable Performance and Final Project Handover
This final section shifts focus from the immediate completion of the project to the long-term sustainability, efficiency, and security of your new plumbing system, which is paramount in the Kenyan context of water management. It concludes with a final commissioning and handover checklist.
Sustainable Plumbing and Water Security in Kenya
Given the prevalence of water stress and seasonal rationing in many Kenyan urban and peri-urban areas, integrating sustainable practices is essential for both environmental stewardship and household water security. Design your new plumbing system to reduce reliance on the county supply.
Water Conservation Technology
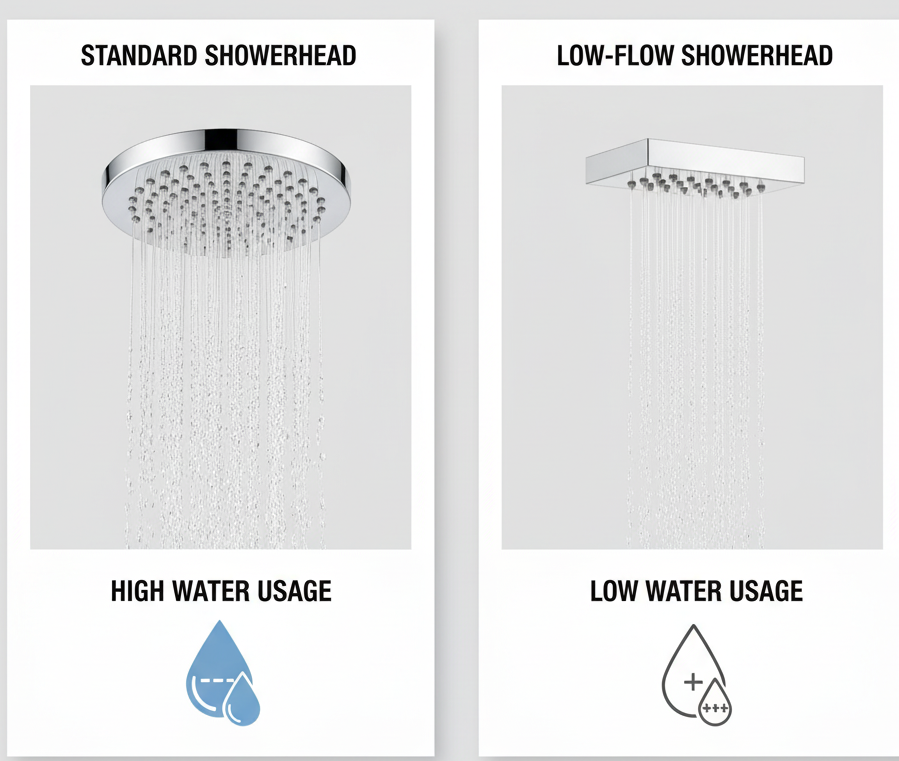
- Low-Flow Fixtures: Install water-saving plumbing fixtures, which are widely available in Kenya.
- Toilets: Use dual-flush toilets (6/3 Litres) or High-Efficiency Toilets (HET).
- Showerheads/Faucets: Fit low-flow showerheads and faucet aerators to reduce flow rates without sacrificing pressure comfort.
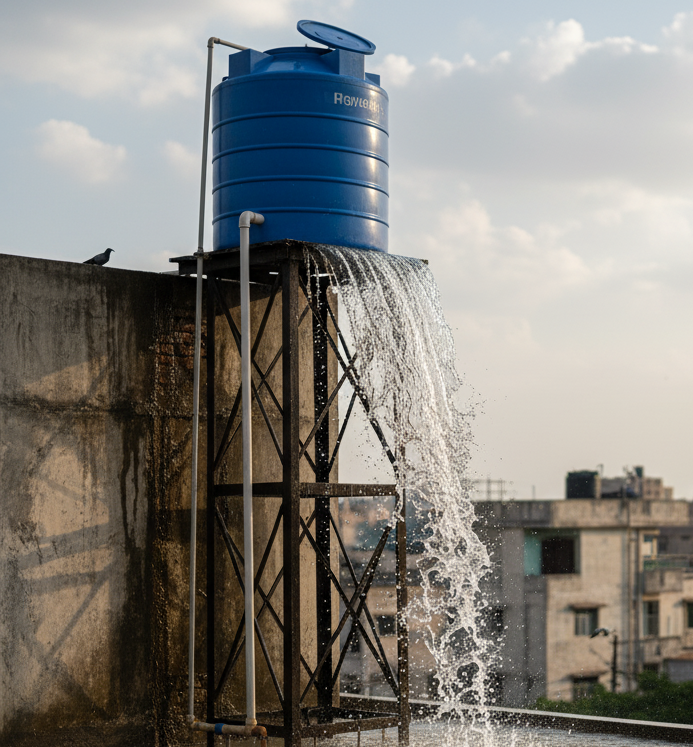
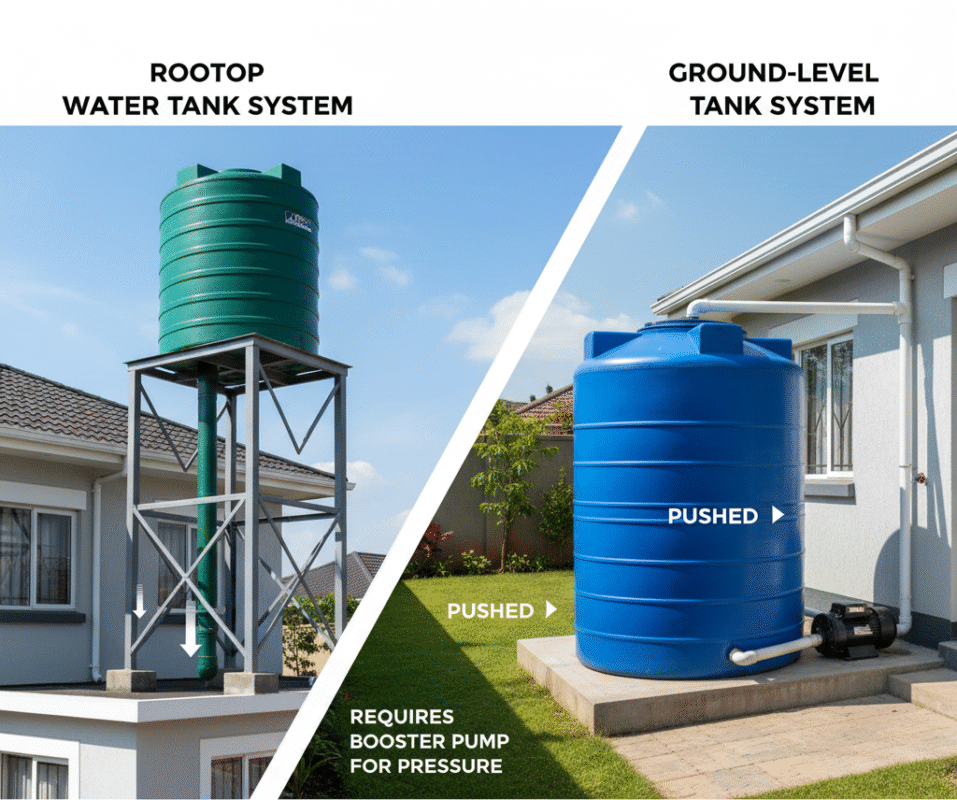
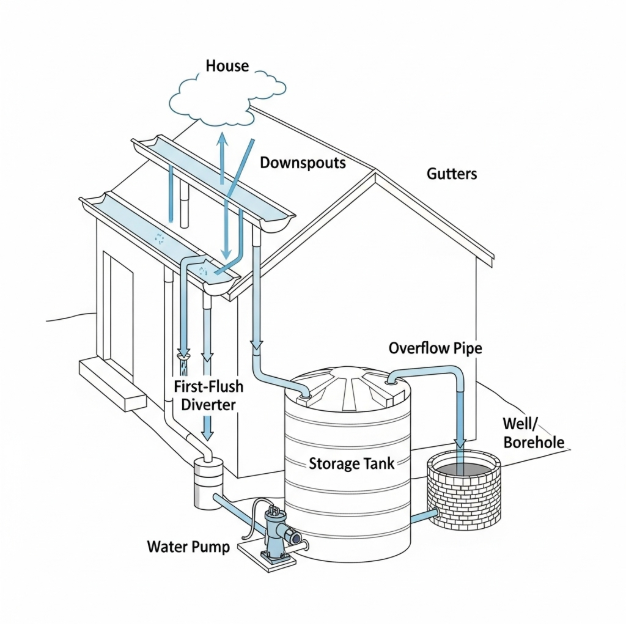
- Rainwater Harvesting (RWH): This is the most practical and impactful system.
- Design Integration: Ensure the roof guttering and downpipes are routed to a suitably sized underground or elevated storage tank.First-Flush Diverter: Incorporate a first-flush diverter to ensure the first few minutes of runoff (which contain roof debris) are excluded from the main tank, improving water quality.
- Usage: Use RWH water for non-potable purposes like toilet flushing, landscaping, and outdoor cleaning to significantly reduce the pressure on the piped supply.
- Greywater Recycling Systems: While more complex, these systems offer maximum water savings.
- Greywater Source: Water from showers, sinks, and washing machines (excluding kitchen sink and toilet waste).
- Application: Install a simple diversion/treatment system to allow this water to be safely reused for irrigation (xeriscaping) or redirected to the toilet cisterns for flushing. Note: Consult with a specialist installer, as these systems must meet the quality standards set by NEMA (National Environment Management Authority) for re-use and discharge.
Future-Proofing and System Longevity
To protect your investment and prepare for the next generation of home technology, consider measures that enhance durability and enable smart monitoring.
Pipe Materials and Durability
- PEX Piping (Cross-linked Polyethylene): Though PVC and PPR are common, consider PEX for hot and cold water lines. It is flexible, highly resistant to corrosion, scale, and chlorine, and easier to repair than metallic pipes, contributing to a longer, maintenance-free service life.
- CPVC (Chlorinated Polyvinyl Chloride): Another modern option, CPVC is engineered for safe water distribution and is self-extinguishing in case of fire.
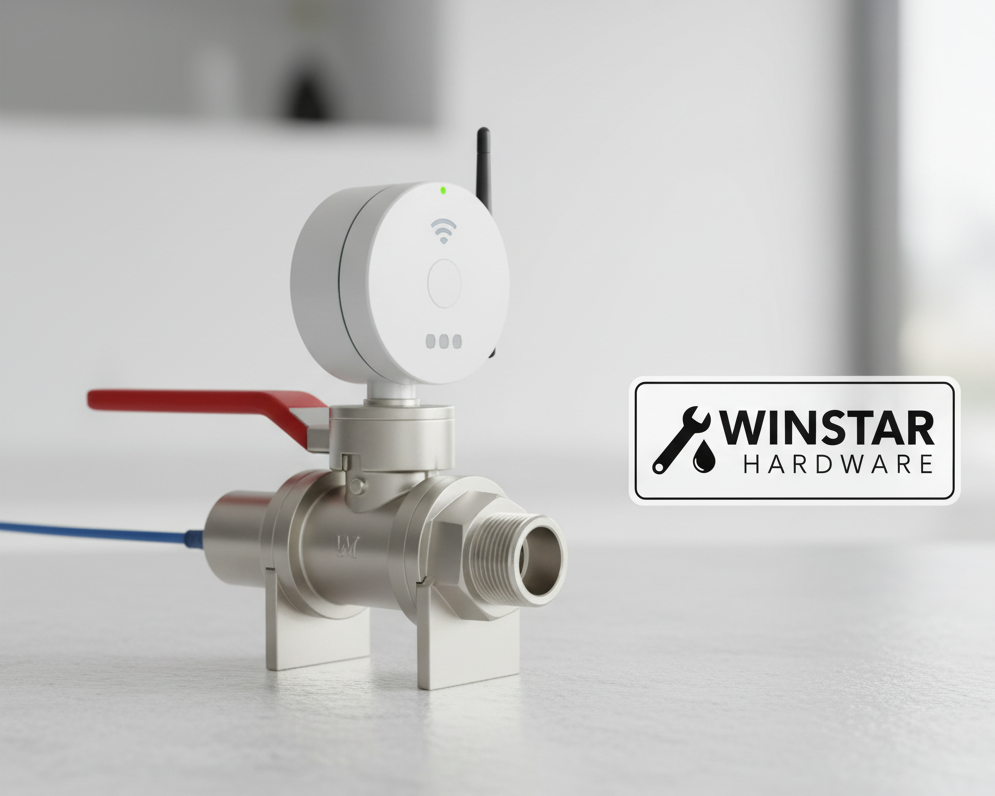
Smart Plumbing and Leak Detection
- Leak Detection Systems: Install a whole-house smart water monitor on the main supply line. These systems use ultrasonic sensors to learn your household’s water usage pattern and can:
- Alert you via a smartphone app to abnormal flow (i.e., a continuous leak).
- Automatically shut off the main water supply in case of a burst pipe, preventing catastrophic water damage.
- Tankless Water Heaters (On-Demand): While the initial cost is higher, these systems save energy by only heating water when a fixture is turned on, a significant efficiency gain over conventional storage tanks.
Final Project Completion and Handover Checklist
Successful project finalization involves more than just a functional system; it requires formal commissioning, testing, and documentation for warranty and future maintenance.
| Task | Detail | Status |
| Final Inspection & Compliance | ||
| NCA/County Sign-off | All required building and plumbing permits are officially signed off. (See Section 2) | ☐ |
| System Pressure Test | Final hydrostatic pressure test (typically 1.5 – 2 times the working pressure for 1 hour) performed and signed by the contractor and witnessed by the owner/engineer. | ☐ |
| Drainage Flow Check | A dye or smoke test confirms all traps and vents are correctly installed, and drainage flows freely without blockages or leaks. | ☐ |
| Fixture Verification | All taps, showers, and toilets function correctly; hot/cold segregation is verified, and all isolation valves are accessible and functional. | ☐ |
| Documentation Handover | ||
| “As-Built” Drawings | Contractor provides a final set of drawings showing the actual location of concealed pipes, valves, and cleanouts. | ☐ |
| Manufacturer Manuals | Handover all user manuals, warranties, and maintenance guides for fixtures, water heaters, and pumps. | ☐ |
| Contact List | Provide a list of key supplier and subcontractor contacts for future repairs or maintenance. | ☐ |
| Maintenance Training | Contractor provides a brief operational training, including the location of the main shut-off valve and instructions for routine tasks like draining the water heater. | ☐ |
| Final Payment & Warranty | ||
| Defects Liability Period | Agree on a defects liability period (e.g., 6 months) during which the contractor is responsible for rectifying any faults that arise from poor workmanship. | ☐ |
| Final Invoice | Clear final payment upon satisfactory completion of all items in this checklist. | ☐ |
Conclusion: Securing Your Investment and Water Future
The plumbing system is often referred to as the lifeblood of your home. Unlike other structural elements, failure in plumbing can lead to immediate, costly, and extensive damage, directly affecting health and sanitation.
Throughout this guide, the emphasis has been on three core pillars:
- Compliance and Professionalism: By adhering to the Kenyan Building Code and standards set by the Water Service Provider (WSP) and NCA, you protect your investment from legal and structural risks. Never compromise on using certified, professional plumbers and obtaining the necessary permits.
- Quality over Cost: The slight initial savings from using substandard materials or cutting corners on critical elements like venting, pipe sizing, or testing will inevitably result in exponential costs down the line. To ensure decades of trouble-free operation, insist on materials like PPR/PEX and fittings sourced from reputable local suppliers, such as Winstar Hardware, combined with rigorous testing (hydrostatic and dye tests).
- Sustainability and Security: In a water-scarce region like Kenya, integrating Rainwater Harvesting (RWH) and low-flow fixtures is not just an environmental choice—it is an economic and household security necessity.
Your completed project represents more than just a functional home addition; it is a certified, high-performance, and sustainable plumbing infrastructure designed for the future. Treat the final “As-Built” drawings and commissioning documentation as invaluable assets, ensuring that future maintenance is straightforward and your family’s health and comfort are secured for years to come.