That frustrating trickle from your showerhead, the slow filling of your kettle, the washing machine taking forever to complete its cycle – low water pressure is more than just an inconvenience. It can disrupt your daily life and even be a sign of a larger plumbing issue brewing in your home. At Winstar Hardware, your trusted source for quality plumbing supplies right here in Kenya, we understand the frustration that low water pressure can cause.
In this comprehensive guide, we’ll delve deep into the common causes of low water pressure in residential plumbing systems, specifically addressing factors relevant to homes in Nakuru, Nairobi and surrounding areas. More importantly, we’ll equip you with a step-by-step approach to diagnose the problem and explore effective DIY solutions you can often implement yourself, potentially saving you time and money. So, let’s roll up our sleeves and get your water flowing freely again!
The Basics of Water Pressure
Before we start troubleshooting, it’s helpful to understand what “normal” water pressure looks like. Generally, good residential water pressure falls within the range of 40 to 60 pounds per square inch (PSI). Anything significantly below this range can lead to the frustrating symptoms we’ve described.
While you might not have a pressure gauge handy, think about your daily experiences:
- Good Pressure: Showering is invigorating, taps fill quickly, and your washing machine operates efficiently.
- Low Pressure: Showering feels weak, filling a basin takes a noticeably long time, and multiple fixtures used simultaneously significantly reduce the flow in others.
If your experience leans towards the latter, it’s time to investigate.
Is It Just You? Checking for Localized vs. Widespread Low Pressure
The first crucial step is to determine if the low water pressure is affecting all the fixtures in your home or just specific ones.
- Localized Low Pressure: If only one or two taps or showerheads have low pressure while others are normal, the issue is likely isolated to those specific fixtures. This could be due to a clogged aerator, a blockage in the showerhead, or a problem with the fixture’s valve.
- Widespread Low Pressure: If all or most of the fixtures in your house are experiencing low water pressure, the problem is likely located further upstream in your plumbing system or even with the main water supply to your property.
Identifying whether the issue is localized or widespread will significantly narrow down the potential causes.
Common Culprits Behind Low Water Pressure in Kenyan Homes
Now, let’s explore the common reasons why you might be experiencing low water pressure:
1. Issues with Your Faucets and Showerheads (Localized)
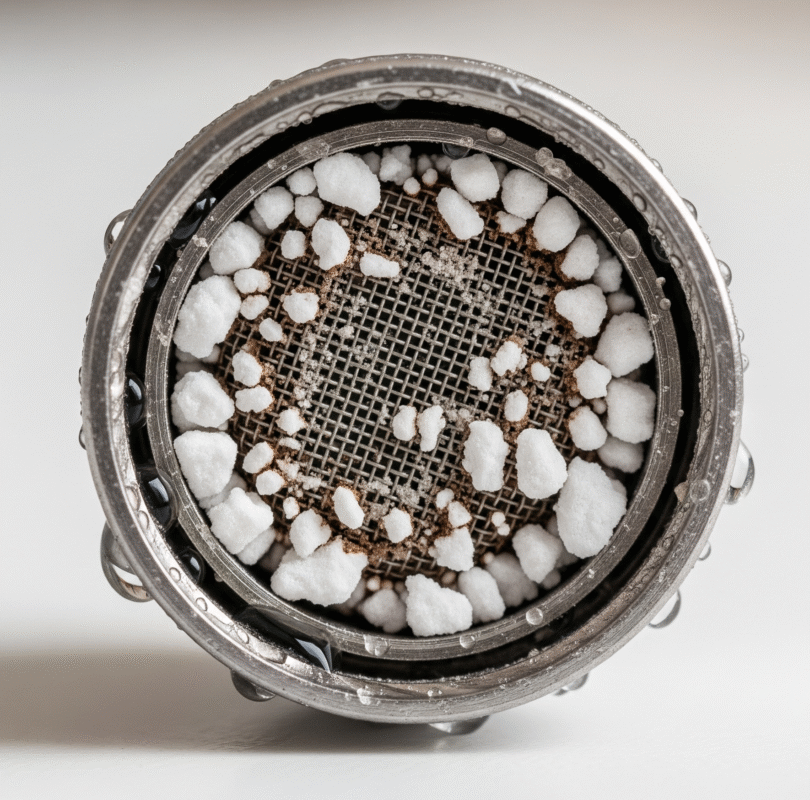
- Clogged Aerators: Faucet aerators are small screens at the tip of your taps that mix air with water. Over time, mineral deposits, sediment, and debris can build up in these aerators, restricting water flow and causing low pressure. This is a very common cause of localized low pressure.
- Clogged Showerheads: Similar to aerators, showerheads have small holes that can become clogged with mineral buildup, especially in areas with hard water. This blockage restricts the spray and reduces pressure.
- Partially Closed Valves: Accidentally bumping or partially closing shut-off valves located near your fixtures can restrict water flow. Check the valves under your sinks and behind your toilets to ensure they are fully open.
2. Plumbing System Blockages (Localized or Widespread)
Mineral Buildup in Pipes
A significant contributor to low water pressure in many parts of Kenya is hard water. Hard water contains high levels of dissolved minerals, primarily calcium and magnesium. When this water flows through your plumbing system, these minerals can precipitate out and build up on the interior surfaces of your pipes and fixtures, a process known as scaling . This buildup acts like a narrowing of the pipe’s pathway, restricting water flow and reducing pressure.
- Impact on Different Materials: The effect of mineral buildup varies depending on your plumbing materials. While modern materials like PPR (Polypropylene Random Copolymer) and PEX (Cross-linked Polyethylene) are highly resistant to this type of buildup, older pipes, particularly galvanized steel, are highly susceptible. Over time, rust and scale inside galvanized pipes can significantly restrict water flow, leading to widespread low pressure and even discolored water.
- Regional Differences in Kenya: The presence of hard water can vary across Kenya. In areas that rely on groundwater sources, such as some parts of Nairobi and Nakuru, the water may contain higher mineral content. This makes understanding your local water quality essential for proactive plumbing maintenance.
Water hardness is measured by the concentration of calcium and magnesium in water. Here is a table highlighting regions in Kenya where water is generally known to be hard.
| Region | Hardness Level | Source of Hardness |
| Nairobi and Environs | Hard | Primarily from boreholes and groundwater sources, which draw from volcanic and basement rock formations rich in calcium and magnesium. |
| Nakuru County | Hard to Very Hard | High mineral content from the volcanic soils and rocks of the Rift Valley. Water from boreholes in the area can have elevated levels of fluoride and other minerals. |
| Coastal Regions (e.g., Kilifi, Mombasa) | Moderately Hard | A result of saltwater intrusion into coastal aquifers and groundwater, particularly in areas with excessive pumping of boreholes near the Indian Ocean. |
| Western Kenya (e.g., parts of Kisumu) | Varies | While surface water from Lake Victoria is generally soft, boreholes and other groundwater sources can be moderately hard due to local geology. |
Sediment and Debris
If your water supply contains sediment or debris (which can sometimes occur with well water or during water main work), these particles can accumulate in your pipes, fittings, and even your water heater, causing blockages and reduced pressure.
Corrosion
Older galvanized steel pipes are prone to corrosion over time. Rust and scale buildup inside these pipes can significantly restrict water flow, leading to low pressure and even discolored water.
3. Issues with Your Water Supply (Widespread)
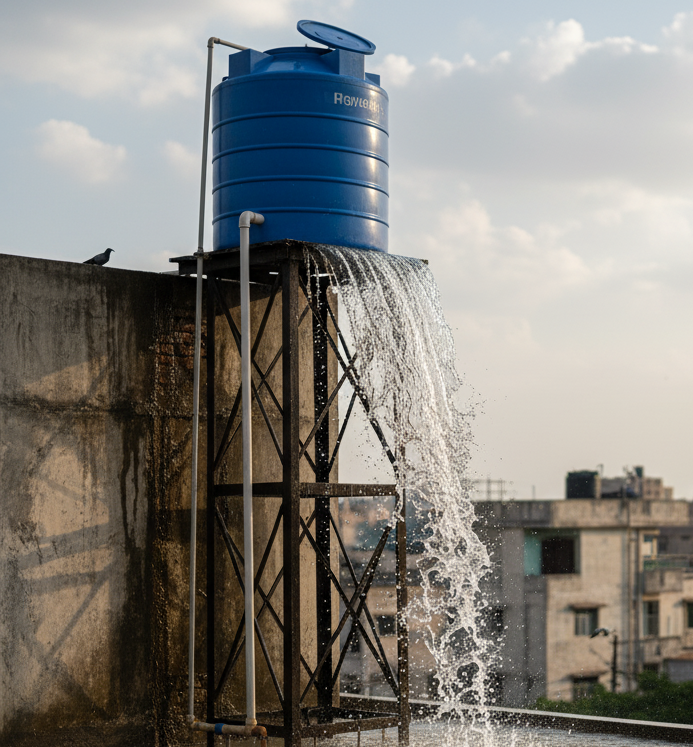
- Problems with the Municipal Water Supply: Sometimes, the issue isn’t within your property’s plumbing system but with the main water supply in your area. This could be due to maintenance work, a burst water main in your neighborhood, or insufficient pressure being supplied by the water company. If your neighbors are also experiencing low pressure, this is a likely cause. You can usually check your local water company’s website or social media for updates on outages or low-pressure advisories.
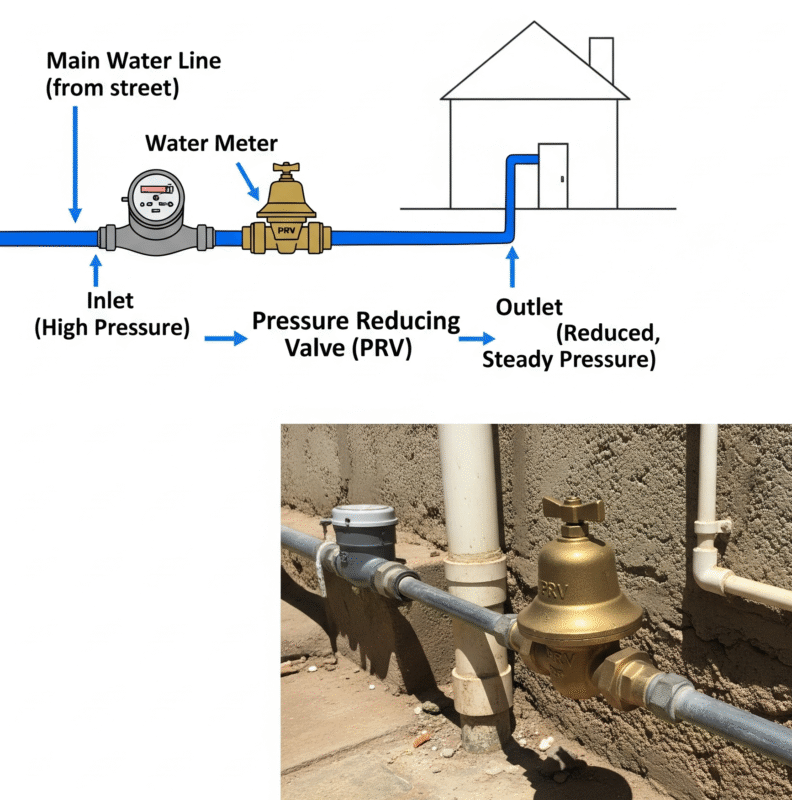
- Your Home’s Pressure Regulator: Many homes have a pressure regulator valve where the main water line enters the house. This valve reduces the incoming water pressure to a safe and consistent level. If this valve is failing, it might be reducing the pressure too much.
4. Issues with Your Water Heater (Widespread, Primarily Hot Water)
- Sediment Buildup in the Tank: Over time, sediment can accumulate at the bottom of your water heater tank. This buildup can restrict the flow of hot water out of the tank, leading to low hot water pressure throughout your home.
5. Simultaneous Use of Multiple Fixtures (Apparent Low Pressure)
- Sometimes, the perception of low water pressure is simply due to multiple people using water simultaneously. If someone is showering while the washing machine is filling and someone else is running the kitchen tap, the available water pressure will be divided among these fixtures, leading to a noticeable drop in flow at each. This isn’t a plumbing problem but rather a limitation of the available water supply at a given time.
A Step-by-Step Guide for Troubleshooting Your Low Water Pressure
Now that you understand the potential causes, let’s go through a systematic approach to diagnose the problem:
Step 1: Talk to Your Neighbors
The easiest first step is to ask your immediate neighbors if they are also experiencing low water pressure. If they are, the issue is likely with the municipal water supply, and you’ll need to contact the local water company.
Step 2: Check Your Faucets and Showerheads
Start by checking the fixtures with the lowest pressure.
- Clean Aerators: Unscrew the aerator from the end of the tap. You can usually do this by hand or with a pair of pliers (be careful not to scratch the finish). Rinse the aerator screen under running water to remove any debris. For stubborn buildup, soak it in a solution of white vinegar and water for a few hours, then scrub it gently with an old toothbrush. Reassemble the aerator and check the water pressure.
- Clean Showerheads: If your showerhead has noticeable mineral buildup around the spray nozzles, try cleaning it. You can often unscrew the showerhead and soak it in a vinegar and water solution overnight. You can also try filling a plastic bag with the solution and securing it around the showerhead with a rubber band, ensuring the nozzles are submerged. After soaking, scrub away any remaining deposits with a brush.
Step 3: Inspect Your Plumbing Valves
Check all the visible shut-off valves under sinks, behind toilets, and near your water meter. Ensure they are fully open by turning the handle counterclockwise as far as it will go.
Step 4: Look for Obvious Leaks
Carefully inspect all visible pipes and fittings for any signs of leaks, even small drips. Leaks can reduce the overall water pressure in your system.
Step 5: Check Your Water Meter (If Widespread Low Pressure Persists)
Turn off all water-using appliances and taps in your house. Go to your water meter and observe the low-flow indicator (usually a small, spinning dial). If this dial is moving, it indicates that water is flowing somewhere in your system, even though everything is turned off, suggesting a potential leak.
Step 6: Consider Your Water Heater (If Primarily Hot Water Pressure is Low)
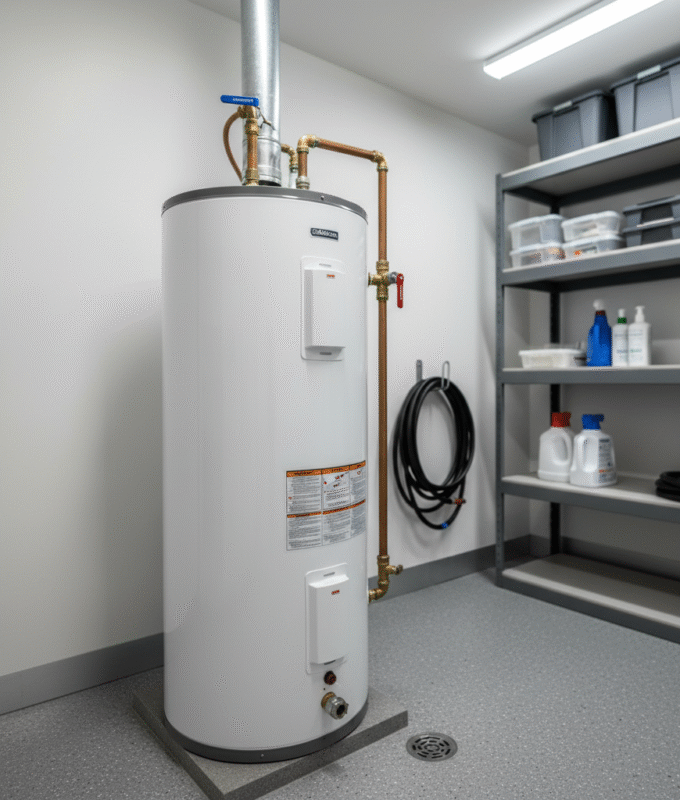
If the low pressure is mainly affecting your hot water, sediment buildup in your water heater tank could be the culprit. Over time, sediment can accumulate at the bottom of your water heater tank. This buildup can restrict the flow of hot water out of the tank, leading to low hot water pressure throughout your home. Many water heater manufacturers recommend flushing the tank periodically to remove sediment.
Step-by-Step Guide on How to Flush Your Water Heater
Sediment buildup at the bottom of your water heater tank can restrict water flow and reduce pressure, especially when you use hot water. Flushing the tank annually is a simple but effective maintenance task.
Tools and Materials You’ll Need:
- A garden hose.
- A bucket.
- A wrench or large screwdriver (for the drain valve).
- Safety gloves.
The Process to Flushing Your Water Heater
Turn Off the Power and Water.
For an electric water heater, turn off the circuit breaker that controls it. For a gas heater, turn the gas valve to the “off” position. Then, locate the cold-water supply valve for the water heater and turn it off. This is crucial for preventing burns and water damage.
Open a Hot Water Tap.
Open a hot water faucet somewhere in your house, like in a bathroom or kitchen. This will relieve any pressure in the tank and help with the draining process.
Connect and Position the Hose.
Locate the drain valve at the bottom of your water heater. It’s usually a small spigot or a valve that can be opened with a wrench. Connect the garden hose to this valve and run the other end of the hose to a place where the water can drain safely, like a floor drain or a bucket.
Open the Drain Valve.
Use a wrench or a large screwdriver to carefully open the drain valve. Be cautious, as the initial water will be hot. The water will start flowing out, and you may see a lot of discolored water or small particles of sediment. This is a good sign—it means you’re flushing out the minerals that were causing the problem.
Flush Until the Water Runs Clear.
Allow the tank to drain completely. Once the flow slows to a trickle, briefly turn on the cold water supply to the water heater. This will stir up any remaining sediment and flush it out. Repeat this process until the water running from the hose is clear.
Close the Valve and Refill the Tank.
Once the water is clear, close the drain valve and disconnect the hose. Be sure to close the hot water faucet you opened earlier. Finally, turn the cold-water supply back on and allow the tank to refill completely before turning the power or gas back on.
For a visual guide on the process, you can watch this video on how to flush your water heater safely. If you’re not comfortable performing this task yourself, it’s best to call a qualified plumber.
Step 7: When to Suspect a Pressure Regulator Issue (If Widespread Low Pressure Persists)
A Pressure Regulator Valve (PRV) is a bell-shaped brass valve typically located near your water meter where the main water line enters your home. Its job is to maintain a constant, safe water pressure throughout your plumbing system, protecting your pipes and fixtures from damage due to high pressure.
Why a PRV Might Fail
A PRV can fail over time due to wear and tear or internal debris, leading to two common problems:
- Failed Open: The valve is stuck open, allowing high pressure from the municipal line to flood your home’s system.
- Failed Closed: The valve is stuck closed or partially closed by sediment, restricting water flow and causing low water pressure throughout your home.
Using a Pressure Gauge to Test Your Water Pressure
A simple pressure gauge is the most accurate way to check your water pressure. You can find one at most hardware stores, including Winstar Hardware.
- Attach the Gauge: Connect the gauge to an outdoor tap or a laundry room faucet. Ensure no water is running in your home.
- Read the Pressure: Open the faucet fully and read the PSI (pounds per square inch) on the gauge. A healthy reading should be between 40 and 60 PSI. If your reading is significantly lower, your PRV may be failing.
Adjusting Your PRV
Most PRVs can be adjusted by tightening or loosening a screw on the top of the bell. However, this is a task best left to a professional plumber. Incorrect adjustments can cause severe damage to your entire plumbing system, leading to burst pipes or damaged appliances.
Strong Disclaimer: It is highly recommended that you contact a qualified plumber for any PRV adjustment or replacement. Attempting this yourself can void warranties and lead to costly repairs. At Winstar Hardware, we can connect you with experienced and certified plumbers who can safely handle this for you.
When to Call a Professional: Advanced Solutions
While many low-pressure issues can be fixed with simple DIY solutions, some problems require the expertise and specialized tools of a professional plumber. Knowing when to call a pro can save you time, money, and a lot of frustration.
Advanced Plumbing Diagnostics
A qualified plumber goes beyond the basic troubleshooting steps. They have access to professional tools and methods to pinpoint the exact cause of low pressure:
- Video Pipe Inspection: Plumbers can use tiny cameras to inspect the inside of your pipes. This is the only way to confirm if a blockage, such as severe mineral buildup or corrosion, is the cause of your low water pressure.
- Flow Meters and Pressure Gauges: Professionals use highly accurate meters to measure water flow and pressure at various points in your system, helping them isolate the problem area.
Professional-Level Fixes and Technologies
Trenchless Plumbing Technology
For a major pipe replacement, especially for an underground pipe, a plumber can use trenchless plumbing technology. This method allows them to replace or repair pipes with minimal digging, saving your garden and driveway from extensive damage. This is a significant advancement that minimizes disruption and is particularly useful in densely populated areas.
PRV Adjustment and Replacement
As discussed previously, your pressure regulator valve (PRV) is a critical component that can cause low pressure if it fails. A professional can safely test, adjust, or replace a faulty PRV to restore the correct water pressure without risking damage to your system.
Water Pressure Booster Pumps
A water pressure booster pump is a powerful device that is installed directly into your main water line. Its function is to increase water pressure throughout your home by pulling water from the municipal supply or a storage tank and pushing it through your plumbing system at a higher, more consistent pressure.
These pumps are an excellent solution for homes that experience:
- Low municipal water pressure: When the water supply from the city or county is weak, a booster pump can correct the issue.
- Multi-story homes: For homes with several floors, gravity can reduce pressure on the upper levels. A booster pump ensures a strong flow on all floors.
- Homes far from the main supply: If your home is located at the end of a long water line, you may naturally have low pressure, which a pump can fix.
Types of Booster Pumps
There are several types of booster pumps, each suited for different applications:
- Pressure-Activated Pumps: These are the most common type for residential use. They automatically turn on when a faucet or appliance is opened and the pressure drops, and they turn off when the demand for water stops.
- Constant Pressure Pumps: These advanced pumps use variable speed drives to maintain a constant, pre-set pressure regardless of how many taps or appliances are running at once. This eliminates pressure fluctuations and provides a luxurious feel.
- Booster Pumps with a Pressure Tank: These systems use a small pressure tank to store water and maintain pressure without the pump running constantly. This reduces wear and tear on the pump and saves energy.
The Value of Professional Installation
While the concept of a booster pump is simple, its installation is a complex task that should be handled by a professional plumber. Here’s why:
- Correct Sizing: A professional plumber will assess your home’s water usage and determine the correct pump size to meet your needs without overwhelming your system.
- Proper Placement: The pump must be installed in a safe, accessible, and dry location, typically near the main water meter or pressure regulator valve. Incorrect placement can lead to noise or damage to the pump.
- System Integration: A plumber will ensure the pump is properly integrated with your existing plumbing and electrical systems, including installing a bypass line for maintenance. They will also check for any other issues, like leaks or blockages, that may be causing the low pressure.
- Warranty Protection: Most pump manufacturers require professional installation for the product warranty to be valid.
Preventative Maintenance for Long-Term Health
Comprehensive Plumbing Maintenance Checklist
Regular maintenance is the key to preventing plumbing problems like low water pressure before they start. Use this comprehensive checklist to keep your home’s system in top condition.
Monthly Checklist: Quick and Easy Checks
- Check for Leaks: Inspect all visible pipes under sinks, around toilets, and behind appliances like the washing machine. Look for drips, moisture, or discolored spots on floors and walls.
- Faucet Aerators: Unscrew and clean the aerators on your kitchen and bathroom faucets. This removes mineral buildup and sediment that can restrict water flow, a common issue in areas with hard water.
- Outdoor Spigots: Check outdoor spigots and garden taps for drips or leaks. This is especially important during the dry seasons when water is a more scarce commodity.
- Drain Flow: Run water in all sinks and tubs to ensure water drains quickly and freely. A slow drain can be an early sign of a blockage.
Quarterly Checklist: Deeper Dives
- Toilet Flush: Listen for any hissing sounds from your toilet tank, which can indicate a faulty flapper or fill valve. You can also add a few drops of food coloring to the tank; if the color appears in the bowl without flushing, you have a silent leak.
- Appliance Hoses: Check the hoses on your washing machine and dishwasher for cracks, bulges, or leaks. Hoses should be replaced every 3-5 years.
- Clean Garbage Disposal: Run a mix of ice cubes and lemon peels through your garbage disposal to sharpen the blades and remove odors.
- Inspect Water Heater: Look for any signs of rust or corrosion on the outside of your water heater.
Annual Checklist: Major Maintenance
- Flush Water Heater: This is one of the most important tasks to prevent sediment buildup. As a reminder, follow the step-by-step guide we provided earlier to ensure your tank is clean and clear.
- Inspect Main Shut-off Valve: Make sure you know where your main shut-off valve is and ensure it is working properly. It should be easy to turn on and off in case of a plumbing emergency.
- Check Pressure Regulator Valve (PRV): Use a pressure gauge to test your home’s water pressure to ensure it is within the healthy range of 40-60 PSI.
- Professional Inspection: Consider having a professional plumber do a full inspection of your plumbing system to catch any issues you might have missed.
Recommended Tools for Home Plumbing Maintenance
- Plunger: A basic and essential tool for clearing clogs.
- Adjustable Wrench: For tightening and loosening pipes and fittings.
- Pipe Wrench: A larger, more robust wrench for bigger jobs.
- Bucket: Useful for catching drips and draining water.
- Pipe Thread Tape: Used to create a watertight seal on threaded pipes.
- Pressure Gauge: For testing your home’s water pressure.
How Water Treatment Systems Prevent Low Pressure
Water treatment systems, such as water softeners, filters, and sediment traps, are proactive solutions that can prevent future low-pressure issues caused by mineral buildup and debris. By treating water at the source, these systems protect your entire plumbing infrastructure, ensuring a strong, consistent flow for years to come.
Benefits and Types of Water Treatment Systems
- Water Softeners: The most effective way to combat hard water. They remove calcium and magnesium ions before they can enter your home’s pipes. By eliminating the source of mineral buildup, a water softener prevents scaling in pipes, water heaters, and fixtures, maintaining optimal water pressure. This is a highly recommended solution for homes in areas like Nairobi and Nakuru, where hard water is a known issue.
- Sediment Filters: These are designed to trap sand, silt, rust, and other debris that can enter your water supply. A sediment filter is installed at the main water line and acts as a first line of defense, preventing these particles from clogging aerators, showerheads, and other fixtures.
- Whole-House Filtration Systems: A more comprehensive solution, these systems not only filter out sediment but also remove chlorine, chemicals, and other contaminants, improving the taste and quality of your water while protecting your plumbing.
The Best Systems for the Kenyan Context
Given the prevalence of hard water and occasional sediment in some regions of Kenya, a combination of a sediment filter followed by a water softener is an ideal solution. This two-part system addresses both major causes of low pressure from water quality—particulate matter and mineral buildup. This investment protects your plumbing system and extends the life of all your water-using appliances, including water heaters and washing machines.
Case Study of A New Home in Nairobi
The Problem
David, a homeowner in a new estate in Nairobi, recently had an extra bathroom added to his house. The new bathroom’s taps and showerhead had noticeably lower pressure than the original ones, a problem that left his family frustrated. He suspected a plumbing issue but wasn’t sure where to start.
The DIY Diagnosis
David began by following the troubleshooting steps. He checked the main water meter and found the pressure was normal. David then looked for leaks in the new bathroom, but found none. Afterwards, he cleaned the new showerhead and tap aerators, but the pressure remained low. This told him the problem was localized to the new addition, not the entire house.
The Solution
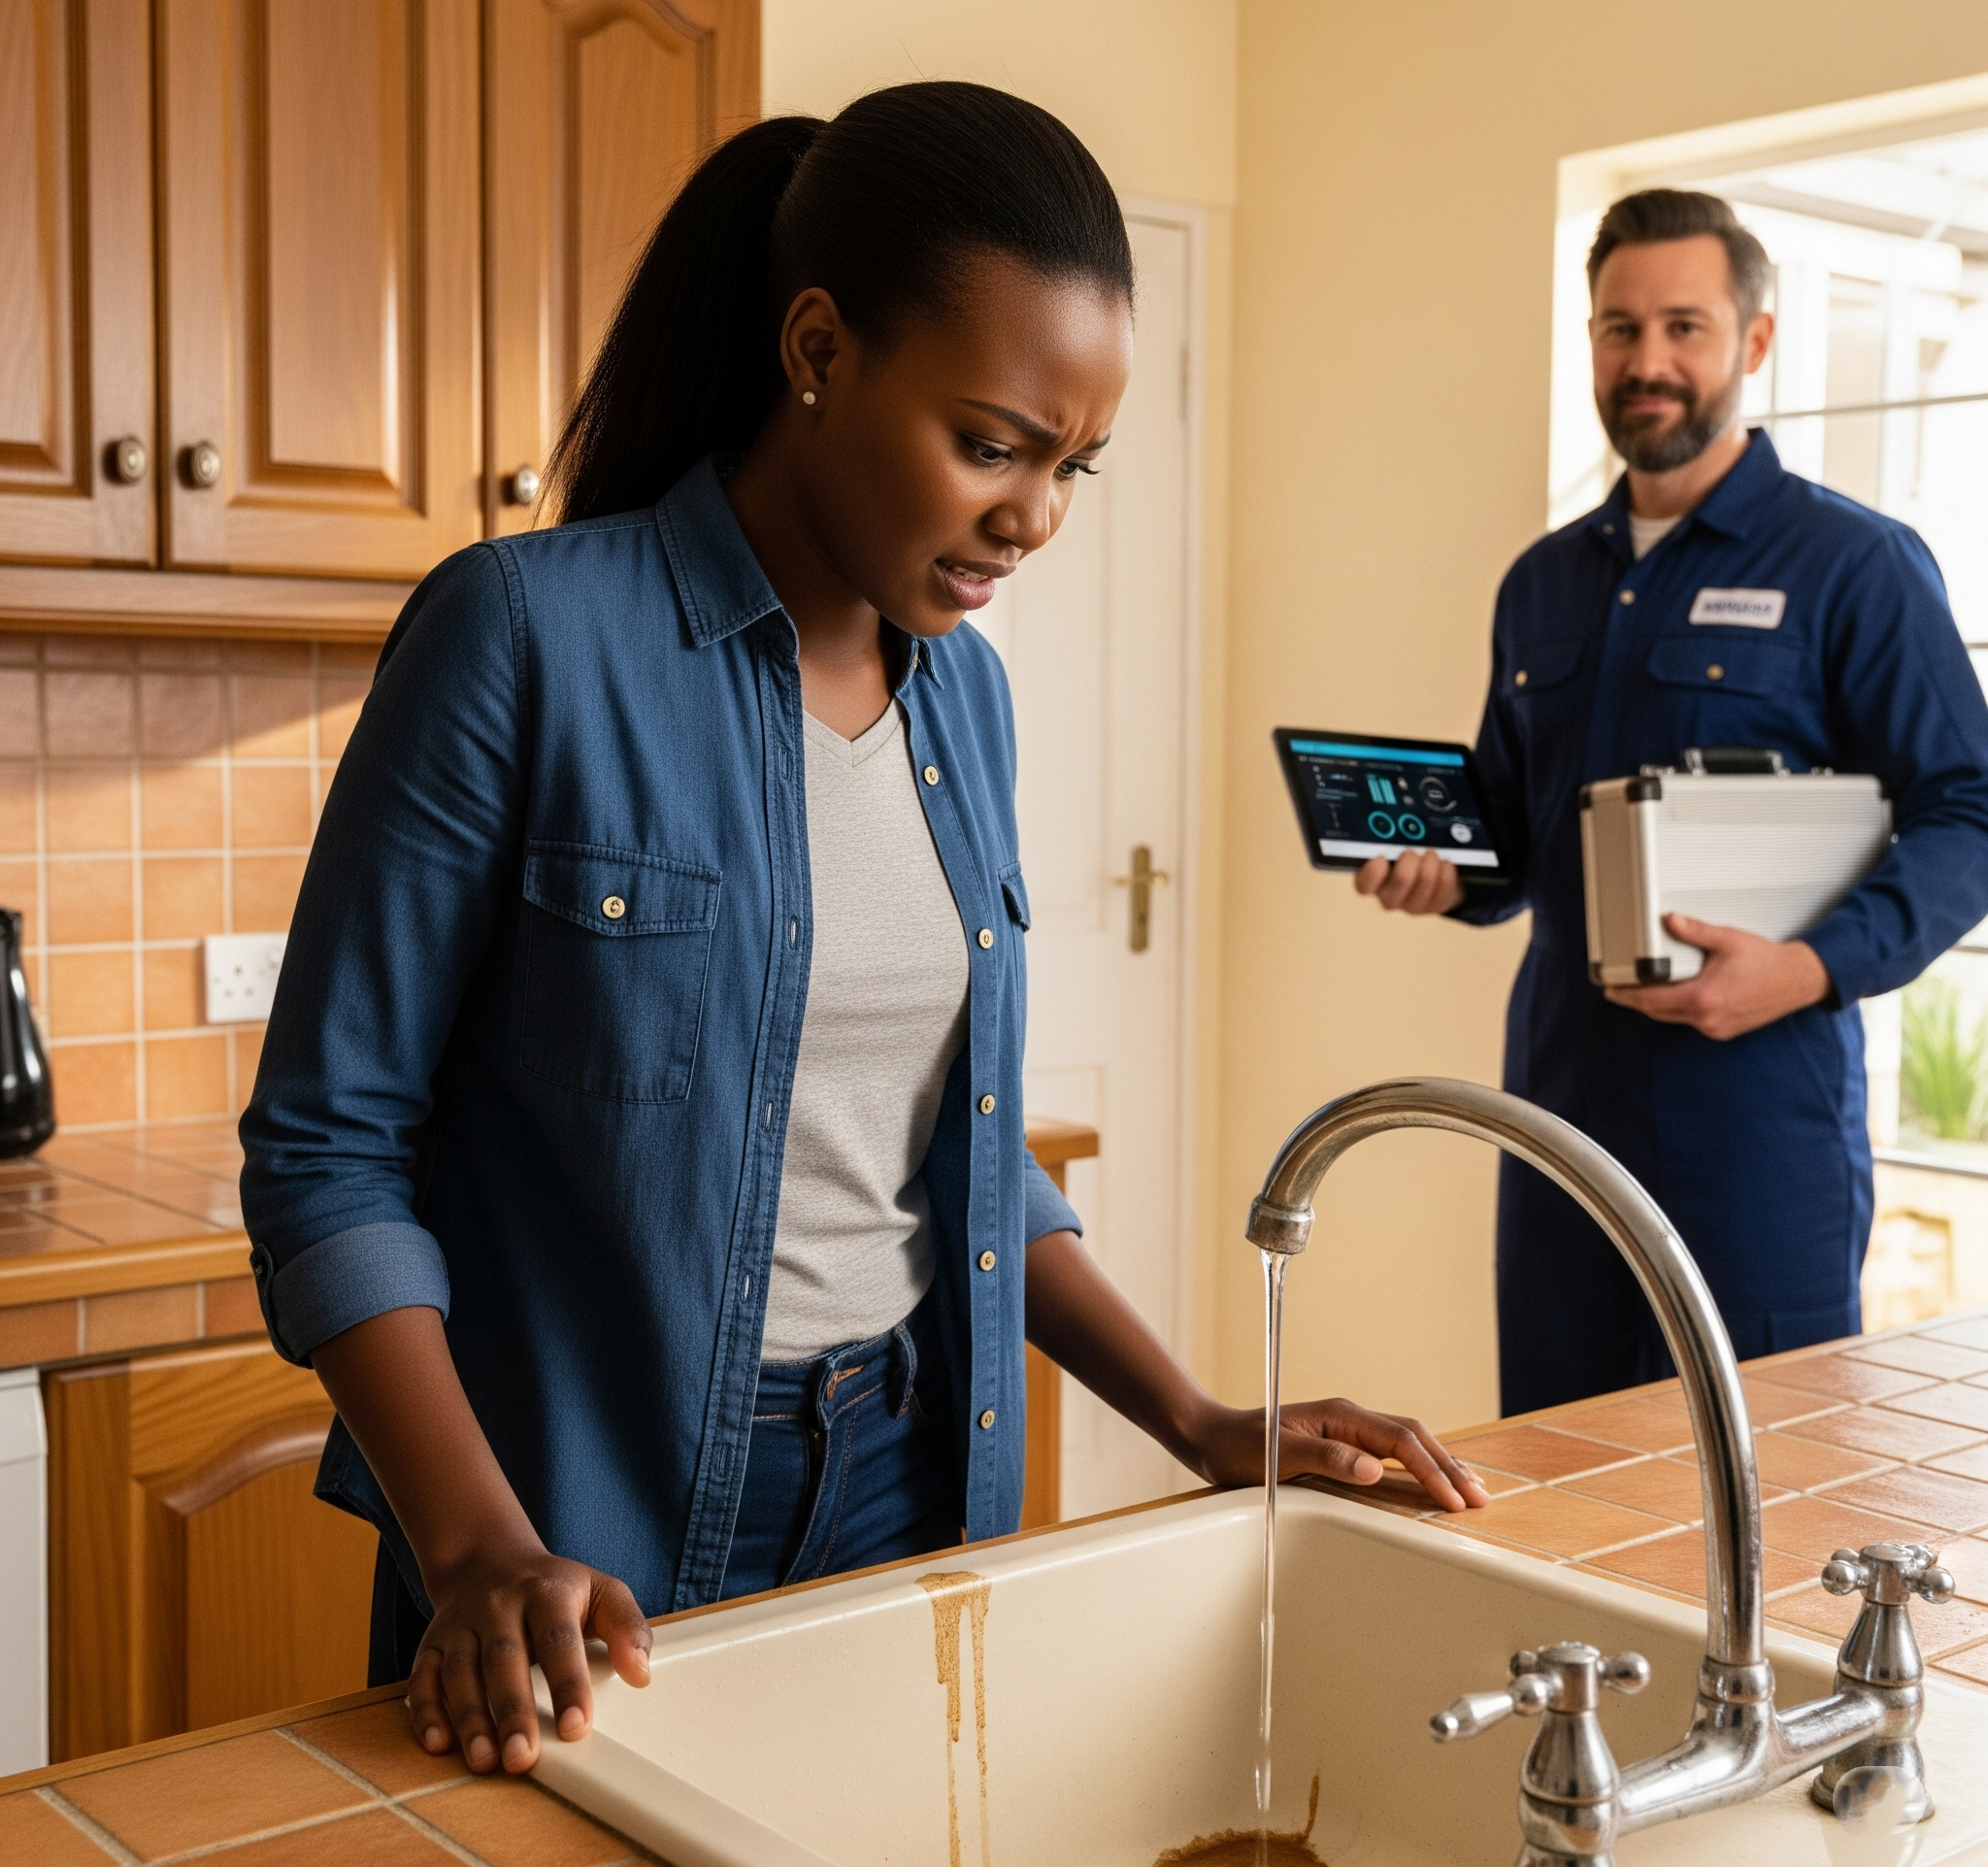
Realizing the issue was more complex than a simple clog, David decided to call a professional plumber recommended by Winstar Hardware. The plumber’s first step was to check the water pressure at the main line, which was a healthy 55 PSI. The plumber then used a pressure gauge to check the pressure at the new bathroom’s water line. The reading was a low 20 PSI, confirming that the pressure drop was happening somewhere between the main line and the new bathroom.
After a quick inspection, the plumber discovered that the new bathroom had been connected to a narrow, undersized pipe that was not sufficient to handle the water demand. The plumber rerouted a new, wider pipe from the main supply line to the new bathroom, ensuring proper water flow.
The Resolution
Once the new pipe was installed, the pressure in the new bathroom was restored to a strong and consistent 55 PSI. David’s family was happy with the powerful shower and quickly filling taps, and he learned that sometimes, the problem isn’t a clog but an issue with the plumbing infrastructure itself.
Winstar Hardware, Your Partner in Maintaining Optimal Water Pressure
At Winstar Hardware, we’re more than just a supplier of quality plumbing materials. We’re your neighbors and your partners in ensuring your home’s plumbing system functions efficiently and reliably. Whether you need a new faucet aerator, a high-quality showerhead designed for optimal flow, tools for leak repair, or advice on when to call a professional, our knowledgeable team is here to assist you.
Don’t let low water pressure dampen your day. By understanding the potential causes and following these troubleshooting steps, you can often identify and resolve the issue yourself. And when you need quality plumbing supplies or expert advice, remember that Winstar Hardware is your trusted source right here in Kenya.
Have you experienced low water pressure in your home? Visit our store today to get the parts you need to fix your water pressure!