Imagine this: You’re ready for a soothing, hot shower after a long day, you turn on the faucet, and all you get is a blast of icy cold water. It’s a jarring, frustrating experience that every homeowner dreads. Yet, for many, the water heater remains a mysterious appliance tucked away in a closet or a basement—out of sight and out of mind until it stops working.
This hands-off approach can lead to costly repairs, sky-high energy bills, and, of course, those dreaded cold showers. But what if you could take control of your home’s hot water supply?
This is where Winstar Hardware comes in. We’ve created the ultimate, comprehensive guide to help you understand your home’s most important plumbing appliance. We’ll walk you through the different water heater types, their pros and cons, and arm you with the knowledge to perform simple DIY maintenance tasks. Our goal is to save you money, extend your unit’s lifespan, and empower you to confidently handle any hot water issue that comes your way. Get ready to turn that frustrating cold shower into a thing of the past!
Understanding Water Heater Types
Choosing the right water heater for your home can feel overwhelming. With so many options on the market, how do you know which is best for you? The first, and most crucial, step is to understand the different water heater types and how they work. Knowing the fundamentals will help you make a smart, long-term decision that saves you money and ensures you have a consistent supply of hot water.
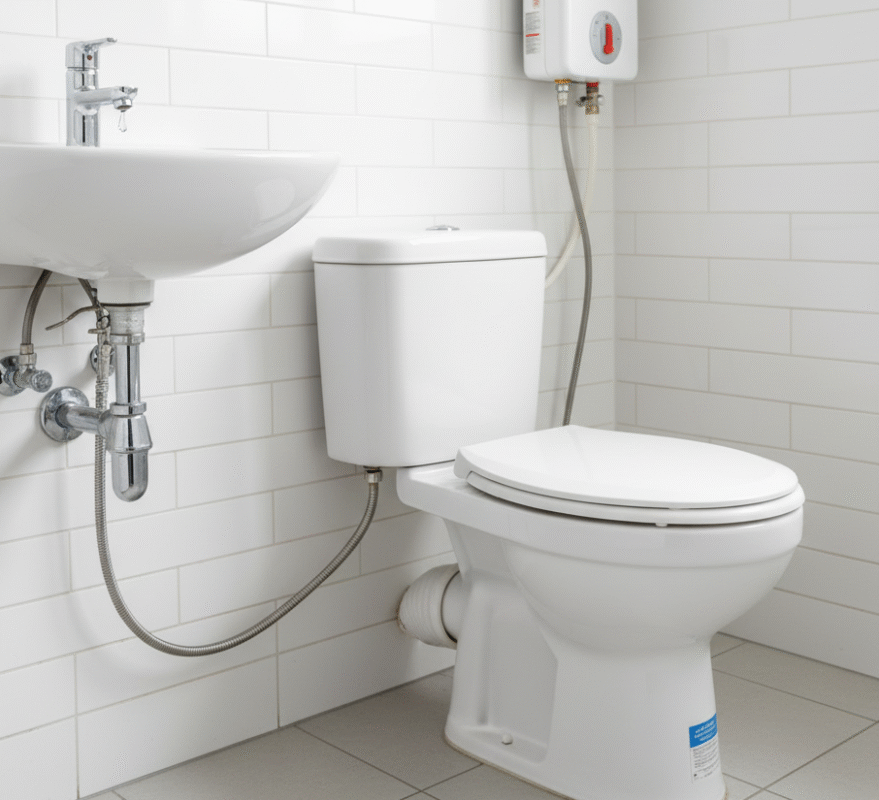
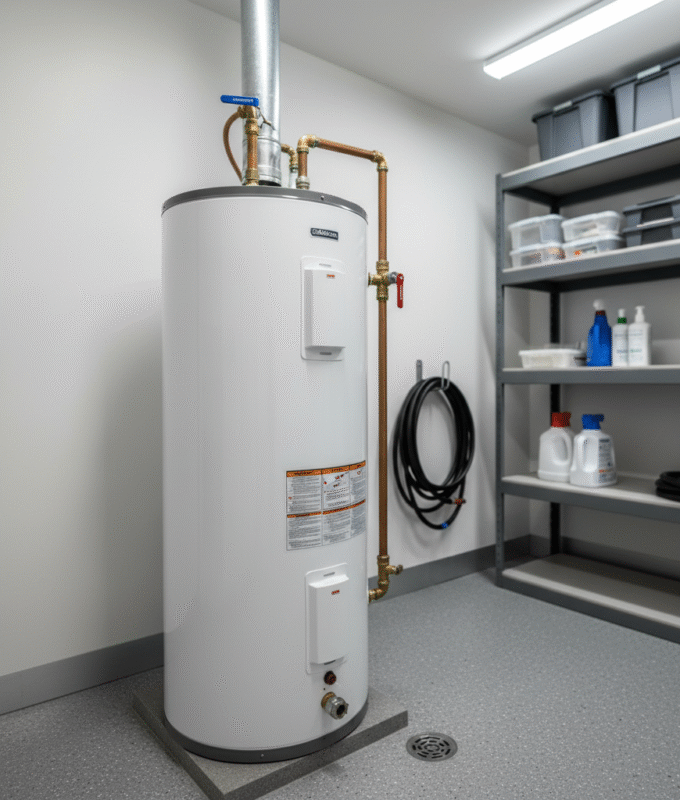
1. Conventional Storage Tank Water Heaters
This is the most common and recognizable type of water heater, consisting of a large, insulated tank that stores and heats water. They are either powered by natural gas or electricity.
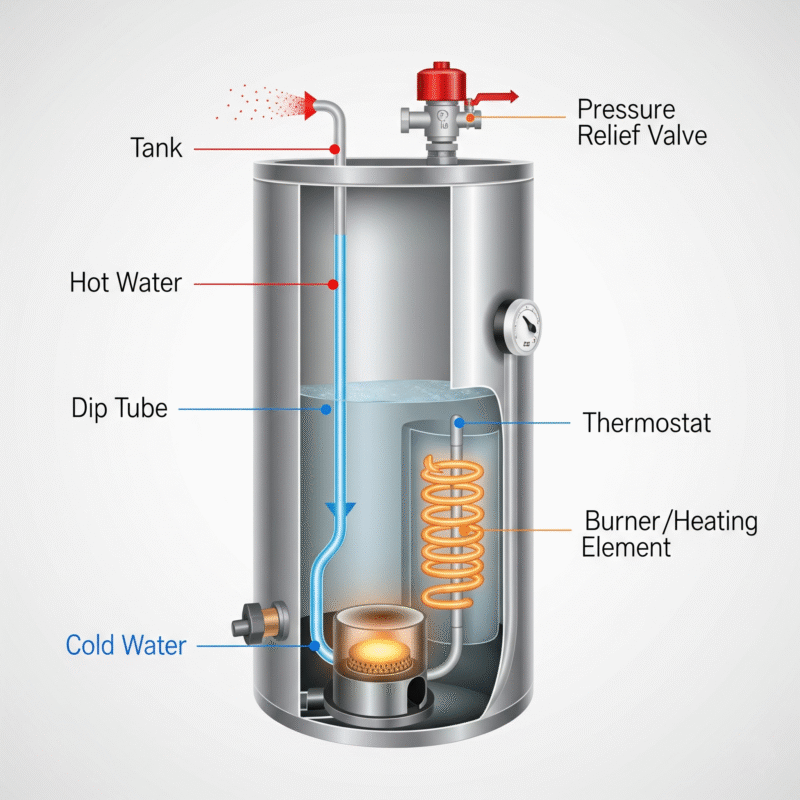
How They Work: Cold water enters the tank through a dip tube that directs it to the bottom. From there, a heating element (in electric models) or a gas burner heats the water. Once the water reaches the set temperature, the unit shuts off, but the tank’s insulation keeps the water warm until it’s needed. When a hot water faucet is turned on, hot water rises to the top of the tank and flows out.
Key Components to Know:
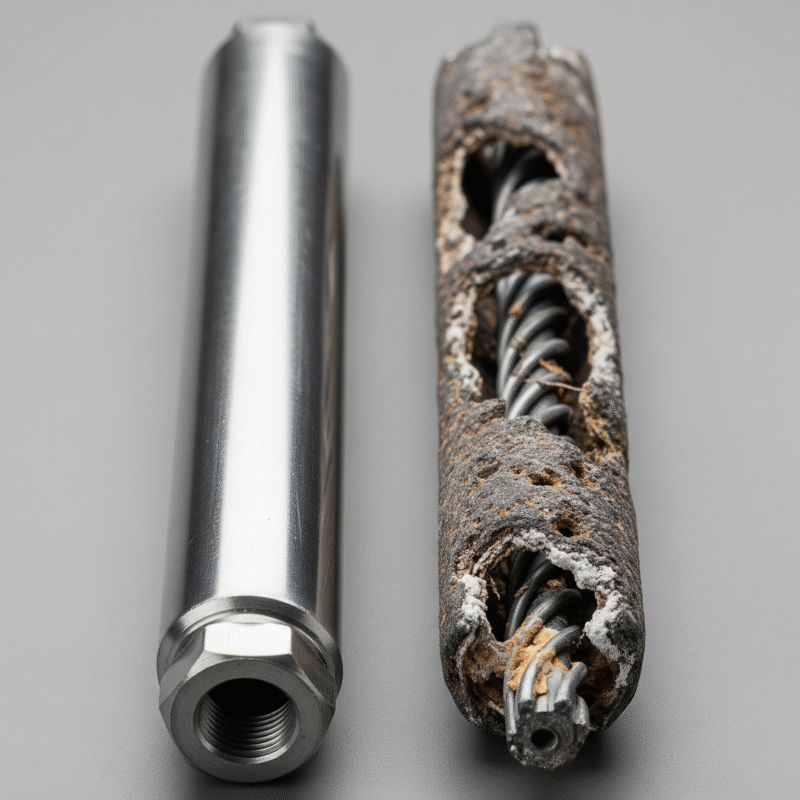
- Anode Rod: This is the most critical component for tank longevity. Made of aluminum, magnesium, or zinc, it sacrifices itself by attracting corrosive elements in the water, preventing the tank’s steel lining from rusting. It must be checked periodically and replaced.
- Dip Tube: A long plastic tube that carries cold water to the bottom of the tank, where it is heated.
- Thermostat: Controls the water temperature, turning the heating element or burner on and off to maintain the set temperature.
- Pressure Relief Valve (or T&P Valve): A vital safety device that automatically opens to release pressure if the temperature or pressure inside the tank becomes dangerously high.
- Drain Valve: Located at the bottom of the tank, this valve is used to drain the tank for maintenance or flushing sediment.
Pros & Cons:
- Pros:
- Lower Initial Cost: They are generally the most affordable option upfront.
- Simple Technology: Conventional design makes them easy for most plumbers to work on, and parts are readily available and inexpensive.
- Reliable: Their proven, straightforward technology has been used for decades.
- Easy to Replace: If your old unit is the same size, a replacement is a relatively simple swap.
- Cons:
- Standby Heat Loss: Even with good insulation, the stored hot water slowly cools down, forcing the unit to cycle on and off to maintain the temperature. This is a significant source of wasted energy.
- Limited Supply: Once the tank’s hot water is used up, it takes time (the “recovery rate”) to heat a new tank full.
- Takes Up Space: The large tank requires a significant amount of floor space.
- Risk of Failure: Tanks can rust and leak, leading to potential water damage.
Sub-types:
- Gas vs. Electric: The most important distinction in conventional water heater types.
- Gas: Heats water using a burner at the bottom of the tank. It is typically more expensive to install but has a faster recovery rate and lower monthly operating costs in many areas. Requires proper ventilation.
- Electric: Heats water using two heating elements (one at the top, one at the bottom). They are easier and cheaper to install but are often slower to heat water and have higher monthly operating costs than gas units.
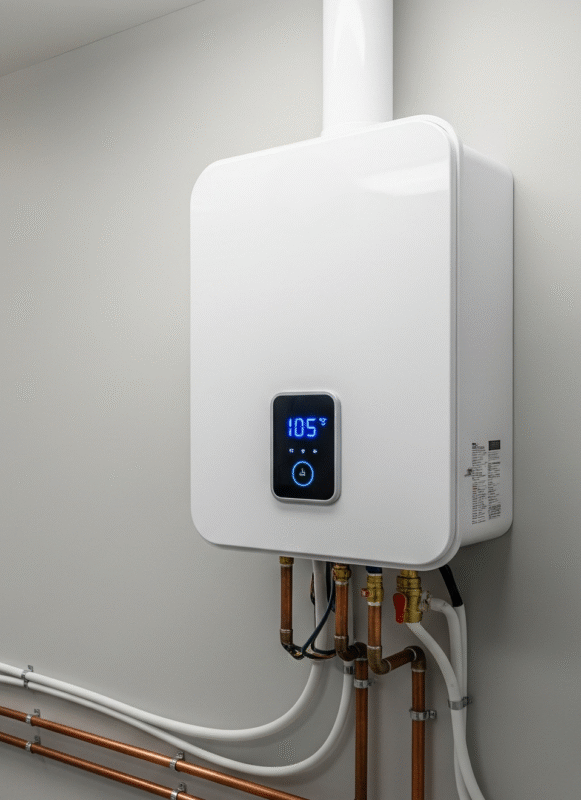
2. Tankless (On-Demand) Water Heaters
These modern appliances have revolutionized the hot water experience by providing an endless supply. They are a great example of an energy-efficient water heater type.
How They Work: When you open a hot water faucet, a flow-activated sensor within the unit detects the demand. A powerful heating element (electric) or gas burner and a heat exchanger then instantly heat the water as it passes through the unit. The hot water flows directly to the faucet without any delay. The unit shuts off as soon as the faucet is closed.
Sizing Your Tankless Unit: Sizing is crucial for tankless heaters. You need to calculate the required “flow rate,” measured in gallons per minute (GPM), and the “temperature rise” to ensure it can handle your hot water needs.
- Flow Rate (GPM): Add up the GPM of all hot water appliances you might use simultaneously. For example, a shower might use 2.5 GPM, a kitchen faucet 1.5 GPM, and a dishwasher 1.5 GPM. If you might run a shower and a kitchen faucet at the same time, you’d need a unit that can provide at least 4.0 GPM.
- Temperature Rise: This is the difference between your incoming cold water temperature and your desired hot water temperature. A unit’s GPM rating decreases as the required temperature rise increases.
Pros & Cons:
- Pros:
- Endless Hot Water: They can supply hot water indefinitely as long as there is demand.
- High Energy Efficiency: There is no standby heat loss because they only heat water when needed, which can significantly lower energy bills.
- Space-Saving: Their compact size allows for wall mounting, freeing up valuable floor space.
- Longer Lifespan: They typically last longer than conventional models, often 20+ years.
- Cons:
- Higher Initial Cost: The units and installation (especially for gas) are more expensive upfront.
- Requires Power: Electric tankless models require a significant amount of electricity, often needing a dedicated circuit.
- Delayed Delivery: There may be a short delay from when the faucet is turned on to when the hot water arrives.
- Maintenance: They require annual descaling to remove mineral buildup, which can be a DIY task but is more complex than flushing a tank.
3. Heat Pump (Hybrid) Water Heaters
This is one of the most innovative and efficient water heater types on the market. They combine the best of both conventional and tankless technologies.
How They Work: They operate like a refrigerator in reverse. A fan draws heat from the surrounding air and transfers it to the water in the tank. They use a compressor to convert the heat to hot air, which is then moved to the water using a heat exchanger. They are also equipped with conventional electric heating elements that kick in when there is a high demand for hot water.
Ideal Location: These units perform best in a space that remains between 40-90°F (4-32°C), like a garage, basement, or utility room. Because they draw heat from the air, they should not be installed in a small, enclosed closet as they will make the space colder. They need at least 1,000 cubic feet of uncooled space to operate efficiently.
Pros & Cons:
- Pros:
- Extremely Energy-Efficient: They can be up to three times more efficient than a standard electric model.
- Lower Operating Costs: Their energy-saving operation means a significant reduction in your utility bills.
- Dehumidifying Effect: As a bonus, they cool and dehumidify the area they are installed in.
- Cons:
- Higher Initial Cost: They are more expensive than conventional electric heaters.
- Space Requirements: They require a large, open space.
- Loud: The fan and compressor can create a low hum or buzz.
4. Solar Water Heaters
For the environmentally conscious homeowner, a solar water heater is an excellent choice. These are a different category of water heater types that leverage renewable energy.
How They Work: A solar thermal system uses collector panels, usually installed on the roof, to absorb heat from the sun’s rays. This heat is used to warm a heat transfer fluid that is then circulated to a storage tank, where it heats the water.
Pros & Cons:
- Pros:
- Lowest Operating Cost: Once installed, the energy to heat the water is free from the sun.
- Eco-Friendly: They have a minimal carbon footprint.
- Government Incentives: Many states offer tax credits or rebates for installation.
- Cons:
- High Initial Cost: They have the highest upfront cost of all water heater types.
- Weather-Dependent: Their performance is tied to the amount of sunlight and can be less effective in cloudy or cold climates.
- Backup System: They almost always require a conventional water heater as a backup for cloudy days or high demand.
5. Choosing the Right Water Heater for Your Home
Now that you’re familiar with the main water heater types, here is a decision-making guide to help you find the perfect one for your home:
Your Decision-Making Checklist:
- Budget: Do you prioritize a lower initial cost (conventional) or long-term savings on utility bills (tankless or heat pump)?
- Household Size & Demand: Do you have a large family that needs a consistent supply of hot water for multiple uses at once (tankless) or is a conventional tank sufficient?
- Energy Source: What is most readily available and affordable in your area—gas or electricity? Do you have access to direct sunlight?
- Available Space: Do you have an open space like a basement or garage for a conventional or heat pump unit, or would a compact, wall-mounted tankless unit be a better fit?
- Environmental Impact: Is lowering your carbon footprint a major factor in your decision?
By considering these factors, you can narrow down your choices and select a water heater that will reliably and efficiently provide your home with hot water for years to come.
Essential Water Heater Maintenance
While understanding the different water heater types is key to making a smart purchase, a heater’s true lifespan and efficiency are determined by how well you maintain it. Much like your car, your water heater needs regular check-ups to prevent small issues from turning into major, costly disasters. Ignoring these simple tasks can lead to reduced efficiency, a shorter unit life, and even a catastrophic tank failure.
Performing these DIY maintenance steps can be intimidating, but we’re here to show you that with the right knowledge and a few basic tools, you can easily handle them yourself. Let’s dive into the essential maintenance routine that will keep your hot water flowing smoothly and your energy bills low.
Flushing the Tank
This is arguably the single most critical maintenance task for any conventional storage-tank water heater. Over time, all water, regardless of its source, contains minerals and sediment that settle at the bottom of the tank. This “sludge” can accumulate, creating several problems:
- Reduced Efficiency: The heating element or gas burner has to heat the sediment before it can heat the water, forcing the unit to work harder and longer. This leads to higher energy consumption and increased utility bills.
- Tank Damage: Sediment can corrode the tank’s liner from the inside out, leading to pinhole leaks and, eventually, complete tank failure.
- Noisy Operation: As sediment heats and cools, it can produce a popping, rumbling, or knocking sound that can be startling and indicates a serious buildup.
Flushing the tank once a year (or more often in areas with hard water) is the best way to prevent these issues.
Required Tools & Materials:
- A garden hose.
- A bucket (to catch initial water).
- A flathead screwdriver (to open the drain valve).
- Channel-lock pliers (if the drain valve is stiff).
- A clean-out hose nozzle (optional, for stubborn sediment).
- Gloves.
Expanded Step-by-Step Guide:
Turn Off the Power/Gas
This is a critical safety step. For an electric unit, turn off the circuit breaker that supplies power to the water heater. For a gas unit, turn the gas valve to the “OFF” position or the pilot setting. This prevents the unit from heating while empty, which could damage the heating elements or burner.
Turn Off the Cold Water Supply
Locate the cold water shut-off valve on the pipe leading into your water heater (it’s usually on the right side). Turn the handle or lever clockwise to shut off the water supply.
Open a Hot Water Faucet
Go to any faucet in your home and turn on the hot water. This relieves the pressure in the system and creates a vacuum, allowing the tank to drain faster. Leave the faucet on until you are done with the process.
Connect the Hose and Prepare to Drain
Attach a garden hose to the drain valve at the bottom of the water heater. Place the other end of the hose in a bucket (to test the initial water) or run it to a floor drain or outside.
Drain the Tank
Open the drain valve on the water heater. The initial rush of water may be cloudy and contain a lot of sediment. This is normal! Let the water drain completely. This can take 15-30 minutes, depending on the size of your tank.
Flush Out Remaining Sediment (Optional but Recommended)
Once the tank is empty, quickly turn the cold water supply back on for a few seconds. You’ll hear water rushing and stirring up sediment. Immediately shut it off. Repeat this “flush and blast” a few times until the water coming out of the hose runs clear.
Close It All Up
Once the water is running clear, close the drain valve. Remove the hose and close the hot water faucet you opened earlier.
Refill the Tank and Restore Power
Turn the cold water supply back on and let the tank fill completely. You’ll hear the sound of rushing water, and you’ll want to check for any leaks from the drain valve. Once the sound of water stops and no air is coming from your faucets, turn the gas or electricity back on.
For a great visual guide on flushing, check out this video on how to efficiently flush your storage-tank water heater.
Checking and Replacing the Anode Rod
The anode rod, often called the “sacrificial rod,” is designed to corrode before the tank lining does, protecting your heater from rust. It should be inspected every 1-3 years and replaced when it is corroded down to about a quarter-inch of its original thickness.
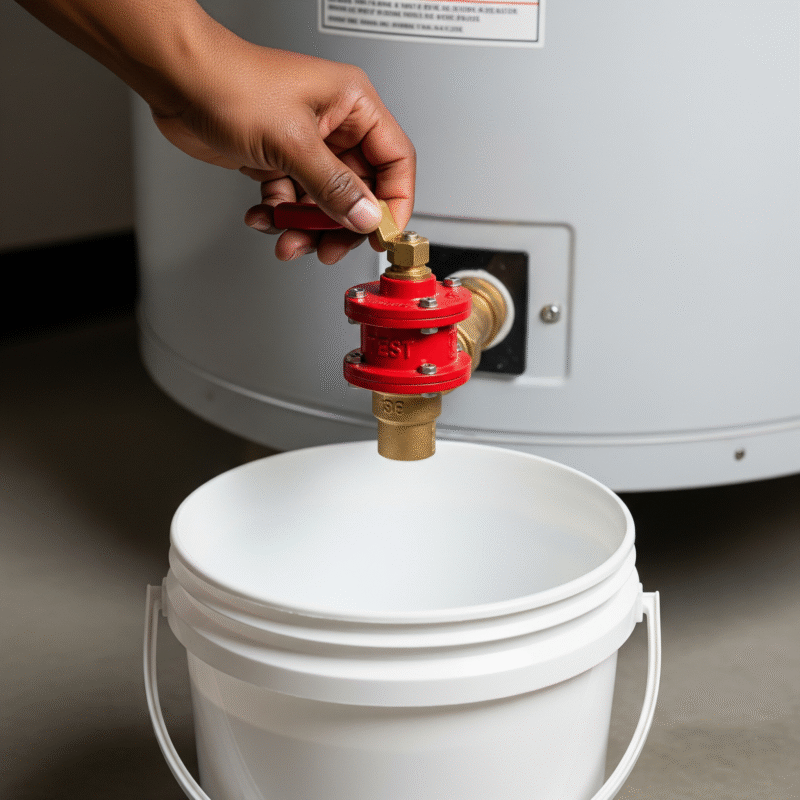
Testing the Pressure Relief Valve (TPR):
The TPR valve is a vital safety device that automatically opens to release pressure if the temperature or pressure inside the tank becomes dangerously high. A stuck valve is a major safety risk as it can lead to a tank explosion.
How to Test It:
- Locate the TPR valve (usually on the top side of the tank).
- Place a bucket under the discharge pipe.
- Carefully lift the valve’s test lever.
- A small amount of water should rush out of the pipe into the bucket.
- If water flows, the valve is working. If no water comes out or it continues to drip, the valve is faulty and needs to be replaced immediately.
Insulating Your Water Heater and Pipes:
Insulating your hot water pipes can help reduce heat loss as water travels from the heater to the faucet, saving you energy. Tank insulation blankets are also available for older storage models, which can help reduce standby heat loss and improve efficiency.
Troubleshooting Common Water Heater Problems
Even with the best maintenance, your water heater may still experience problems. Knowing how to quickly and accurately diagnose these issues is a valuable skill that can save you time, money, and a lot of frustration. This section will turn you into a hot water detective, empowering you with the knowledge to troubleshoot the most common water heater problems.
No Hot Water
This is the most alarming water heater issue, but it often has a surprisingly simple solution. Before you panic, check these common culprits:
Tripped Circuit Breaker (Electric Water Heaters)
An electrical surge or a short can cause the breaker for your water heater to trip.
- Diagnosis: Go to your electrical panel and check the breaker labeled for your water heater. If it’s in the “off” or “tripped” position (usually halfway between on and off), simply flip it back to the “on” position.
- Fix: If the breaker trips again immediately, you have a more serious electrical problem, and it’s time to call a professional electrician.
Pilot Light is Out (Gas Water Heaters)
The pilot light is a small flame that ignites the main burner. It can be extinguished by a draft or a faulty thermocouple.
- Diagnosis: Locate the pilot light (usually visible through a small window on the control unit). If it’s not lit, that’s your problem.
- Fix: Follow the manufacturer’s instructions to relight the pilot. This typically involves holding down a button while lighting the pilot and then releasing it slowly. If the pilot light won’t stay lit, the thermocouple may need to be replaced.
Faulty Thermostat
The thermostat controls the water temperature. If it’s broken, it won’t signal the heating elements or burner to turn on.
- Diagnosis: For electric water heaters, you will need to test the thermostat with a multimeter. A professional is usually required for this.
- Fix: The thermostat must be replaced.
Broken Heating Element (Electric Water Heaters)
In electric water heater types, a broken element will prevent the water from heating.
- Diagnosis: A professional can test the elements for continuity. If one or both are broken, the unit won’t heat the water.
- Fix: The faulty element(s) must be replaced.
Not Enough Hot Water
If your water isn’t staying hot long enough, the problem might not be with a broken component, but rather with the settings or a simple issue. This can affect all water heater types.
Thermostat Set Too Low
This is the most common and easiest issue to fix.
- Diagnosis: Check the temperature setting on your thermostat. It should be set to at least 120°F (49°C) to prevent bacterial growth and to provide enough hot water.
- Fix: Adjust the thermostat to a higher temperature. Allow several hours for the water to heat up before testing.
Sediment Buildup in the Tank
As mentioned in the maintenance section, sediment can reduce the effective volume of your tank and block the heat from reaching the water.
- Diagnosis: If you hear popping or rumbling noises, or if your hot water supply has been steadily decreasing over time, it’s likely due to sediment.
- Fix: Perform a full tank flush as described in the maintenance section.
Undersized Unit
Your unit may have been sized incorrectly for your household’s hot water needs.
- Diagnosis: If you run out of hot water every time someone takes a second shower or you run a large appliance, your unit may be too small.
- Fix: Unfortunately, there is no simple fix for this other than replacing the unit with a larger conventional model or upgrading to one of the tankless water heater types.
Strange Noises
Your water heater should operate quietly. Any rumbling, popping, or cracking sounds are a clear sign that something is wrong.
Rumbling or Popping Sounds
This is almost always caused by sediment buildup at the bottom of a conventional tank. As the heating element or burner heats the sediment, steam pockets form and then escape, causing a rumbling or popping sound.
- Fix: Flush the tank thoroughly to remove the sediment. If the sound persists, you may have a more serious issue that requires a professional.
Cracking or Knocking Sounds
These sounds often originate from water hammer, which is the result of water abruptly stopping in the pipes when a faucet is turned off. It can also be caused by the expansion of the tank as it heats up.
- Fix: Check your plumbing for water hammer. You may need to install water hammer arrestors. For noise from the tank itself, ensure the unit is level and the bolts are not overtightened.
Leaks
A leak is a serious sign that your unit needs attention immediately. The source of the leak will determine the severity of the problem.
Leak at the Top of the Heater
- Cause: This is often the least serious type of leak. It usually comes from a loose plumbing connection at the cold water inlet, hot water outlet, or the pressure relief valve.
- Fix: Ensure the connections are tight. If a pipe is leaking, the fitting or valve may need to be replaced.
Pressure Relief Valve (TPR) Leak
- Cause: The valve may be faulty, or your home’s water pressure may be too high. A constantly dripping valve indicates a problem.
- Fix: First, check your home’s water pressure with a pressure gauge. If it’s too high (over 80 PSI), you need a pressure reducing valve. If the pressure is normal, the TPR valve is likely faulty and should be replaced.
Leak from the Bottom of the Tank
- Cause: This is the most severe and almost always indicates that the tank itself has rusted through and failed. The leak is coming from the inner lining, not from a connection.
- Fix: A tank that is leaking from the bottom is not repairable and must be replaced. This is the end of the line for your water heater.
Conclusion: Take Control of Your Hot Water
Congratulations! You’ve now navigated the complexities of your home’s hot water system. By understanding the different water heater types, the value of a consistent maintenance routine, and the key troubleshooting steps for common problems, you’ve empowered yourself to prevent unexpected issues and prolong the life of your unit.
From now on, you won’t have to dread that cold shower. You’ll know what that rumbling sound means, how to flush away damaging sediment, and when it’s time to call in a professional. This knowledge isn’t just about saving money—it’s about confidence and security in your home.
For all the tools, parts, and expert advice you need to maintain or upgrade your water heater, visit Winstar Hardware. Our team is ready to help you ensure a reliable, efficient, and comfortable home for years to come.